“UD Browser ver.2.4” Operating Manual
Yasushi Nakano (Keio University)
nakanoy@z7.keio.jp
This app is a browser app for iOS, which enables users to browse documents, such as text books and teaching materials etc. It is easy for people not only those who are “low vision” users, but we also for a wide variety of users to use it.
The app was designed (features and specifications) by the Yasushi Nakano laboratory at Keio University, coordinated by Kaga Solution Network Co. Ltd., and programmed by Climb App.
Compared to other document browsing apps, this app has three distinct features. The first feature is its design in consideration of the recognition and operation by users with low vision. The second feature is the ease to create and use your own data. Finally, the third feature is the voice output function that considers the convenience of users using “VoiceOver” and those users who need to read out loud. Below are the main features.
The standard document browsing apps, such as iBooks, have legibility-related issues for “low vision” users in their displays, such as document menus, pop-up menus (menus displaying pop-ups during dictionary searches or when reading out loud), pages and bookmarks being small and difficult to read. It also takes time to search for a particular page, follow the line, and when turning pages, the magnification rate returns to its original state. There are also operability-related issues such as the next page being displayed even when this is not intended. Therefore, we have given UD Browser the following features to resolve these issues.
a) Improved legibility of the main menuIn previous browsing apps, the main menu display was small, and could not be expanded by pinching. Thus, low vision users were forced to either use the iOS standard zoom function (zoom that functions by expanding through double-tapping screens with three fingers, rather than by pinching), or using of a visual aid such as a loupe or CCTV. With this app that considers the visual characteristics of low vision users, we have made the menu bigger (approximately twice the height of the previous app), and increased the contrast to make it easier to read.
b) Improved legibility of the pop-up menusIt is necessary to look at the area you want to investigate and select to look things up in the dictionary or have things read aloud with voice. In previous apps, by selecting the character string you wish to investigate or have read out, the pop-up menus for which “speech, copy, dictionary” etc. can be selected are displayed. However, the characters displayed in the pop-up
With previous apps, when searching for pages, it was necessary to look at thumbnails (approximately 5x5mm) and move your fingers to find the page that you want. With this app, we have improved operability for opening a specific page, by loading the same interface number input as mobile telephones. Thus, you can simply jump to a specific page. This allows a swift response to everyday classroom instructions like “Open your textbooks to page 32”.
d) Improved usability through scroll assistance functionsWhen magnifying and reading text books and teaching materials, it was difficult to follow the sentence, and change lines. For this reason, if a tablet terminal was used, scanning operation training was necessary to smoothly follow the line. In this app, it is possible to control operation with a key operation, to simplify scanning. It is possible to use nearly all the functions of this app with keyboard operations, including enlarging/reducing and turning pages. For people who find it difficult to perform touch operations using their fingertips, it is possible to perform operations using switch input linked to the keyboard. Key operations are not limited to external keyboards, and can be done through a software-based on-screen keyboard as well.
e) Improved legibility and usability using a hybrid fixed-type and reflow layout display functionFigures and tables are often used by text books and teaching materials, and these sometimes have important information included in the layout. For this reason, fixed-type layout data, such as PDF, that holds the same information as the paper text book layout is required. On the other hand, it is known to be easier to read data in reflow layout when reading stories and commentaries, such as in EPUB, where only the characters of the main text are displayed. This app, therefore, is equipped with a hybrid display function in which you can switch between and use modes displayed in the same layout as paper (layout display mode) and the mode in which only text characters are displayed (reflow display mode). In reflow display mode, even if the character size is magnified, the texts can be displayed in a wrap-around format, and following the line is easier. There are various formats for reproducing reflow-type layout, such as EPUB or DAISY, but for this app, we adopted HTML, which is simple to create. As the open source HMTL rendering engine WebKit is used for reflow display mode, HTML, CSS, JavaScript, and MathML etc. can be used.
Browsers and apps that can be used to handle text books and teaching materials often use file formats such as EPUB and DAISY etc. These file formats are standard formats for creating electronic documents and accessible electronic teaching materials. However, there is lacks of apps that can create data in these file formats, and these are not commonly available. This presents a difficult challenge for the faculty members and low vision users themselves to create data. The issue has been taken care of in this app by using PDF and HTML which make it easy for the faculty members and low vision users to create data by them.
Since ver.2.3, we added a function to automatically create HTML files from Word files. When linked to other applications, it is possible to automatically create HTML and PDF from your own materials created in Word.
Since ver.2.3, we have added compatibility with Voice Over. It is possible to read aloud with Voice Over in either PDF mode or HTML mode. We have enhanced HTML mode voice compatibility functions so that Voice Over users can access files more easily. For example, we have prepared page display and page reading functions etc. in HTML mode. Furthermore, when there is kana of the kanji available, the kana is read in advance as a priority (kana reading can be used in PDF mode or HTML mode). We have enabled the setting “Prioritize reflow file”, in consideration of use by Voice Over users,
Start the “UD Browser” by tapping the icon on the home screen (figure 1).
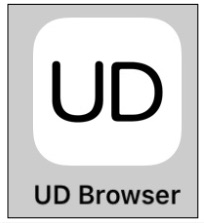
Figure 1 “UD Browser” App Icon
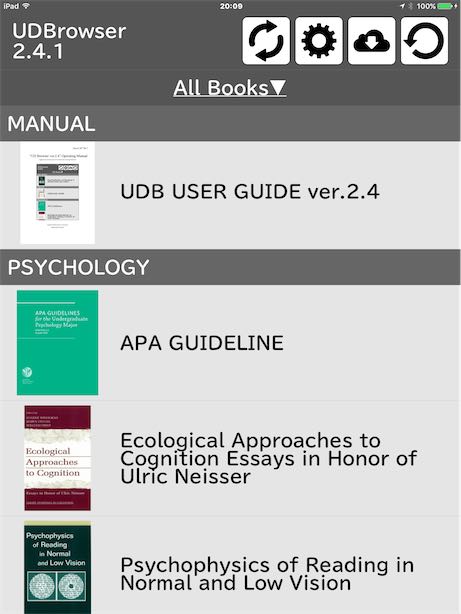
The Library (figure 2) appears when you start the “UD browser” app. In the Library, a list of cover images and titles of the documents (text book/teaching materials, etc.) are displayed as a list. When you tap the document you wish to read, you can open the document. Using title display, titles are listed alphabetically. Since ver.2.3, it is possible to display by “category”. By setting the “category” in the JSON file to be described later, it is possible to gather and display files in the same category.
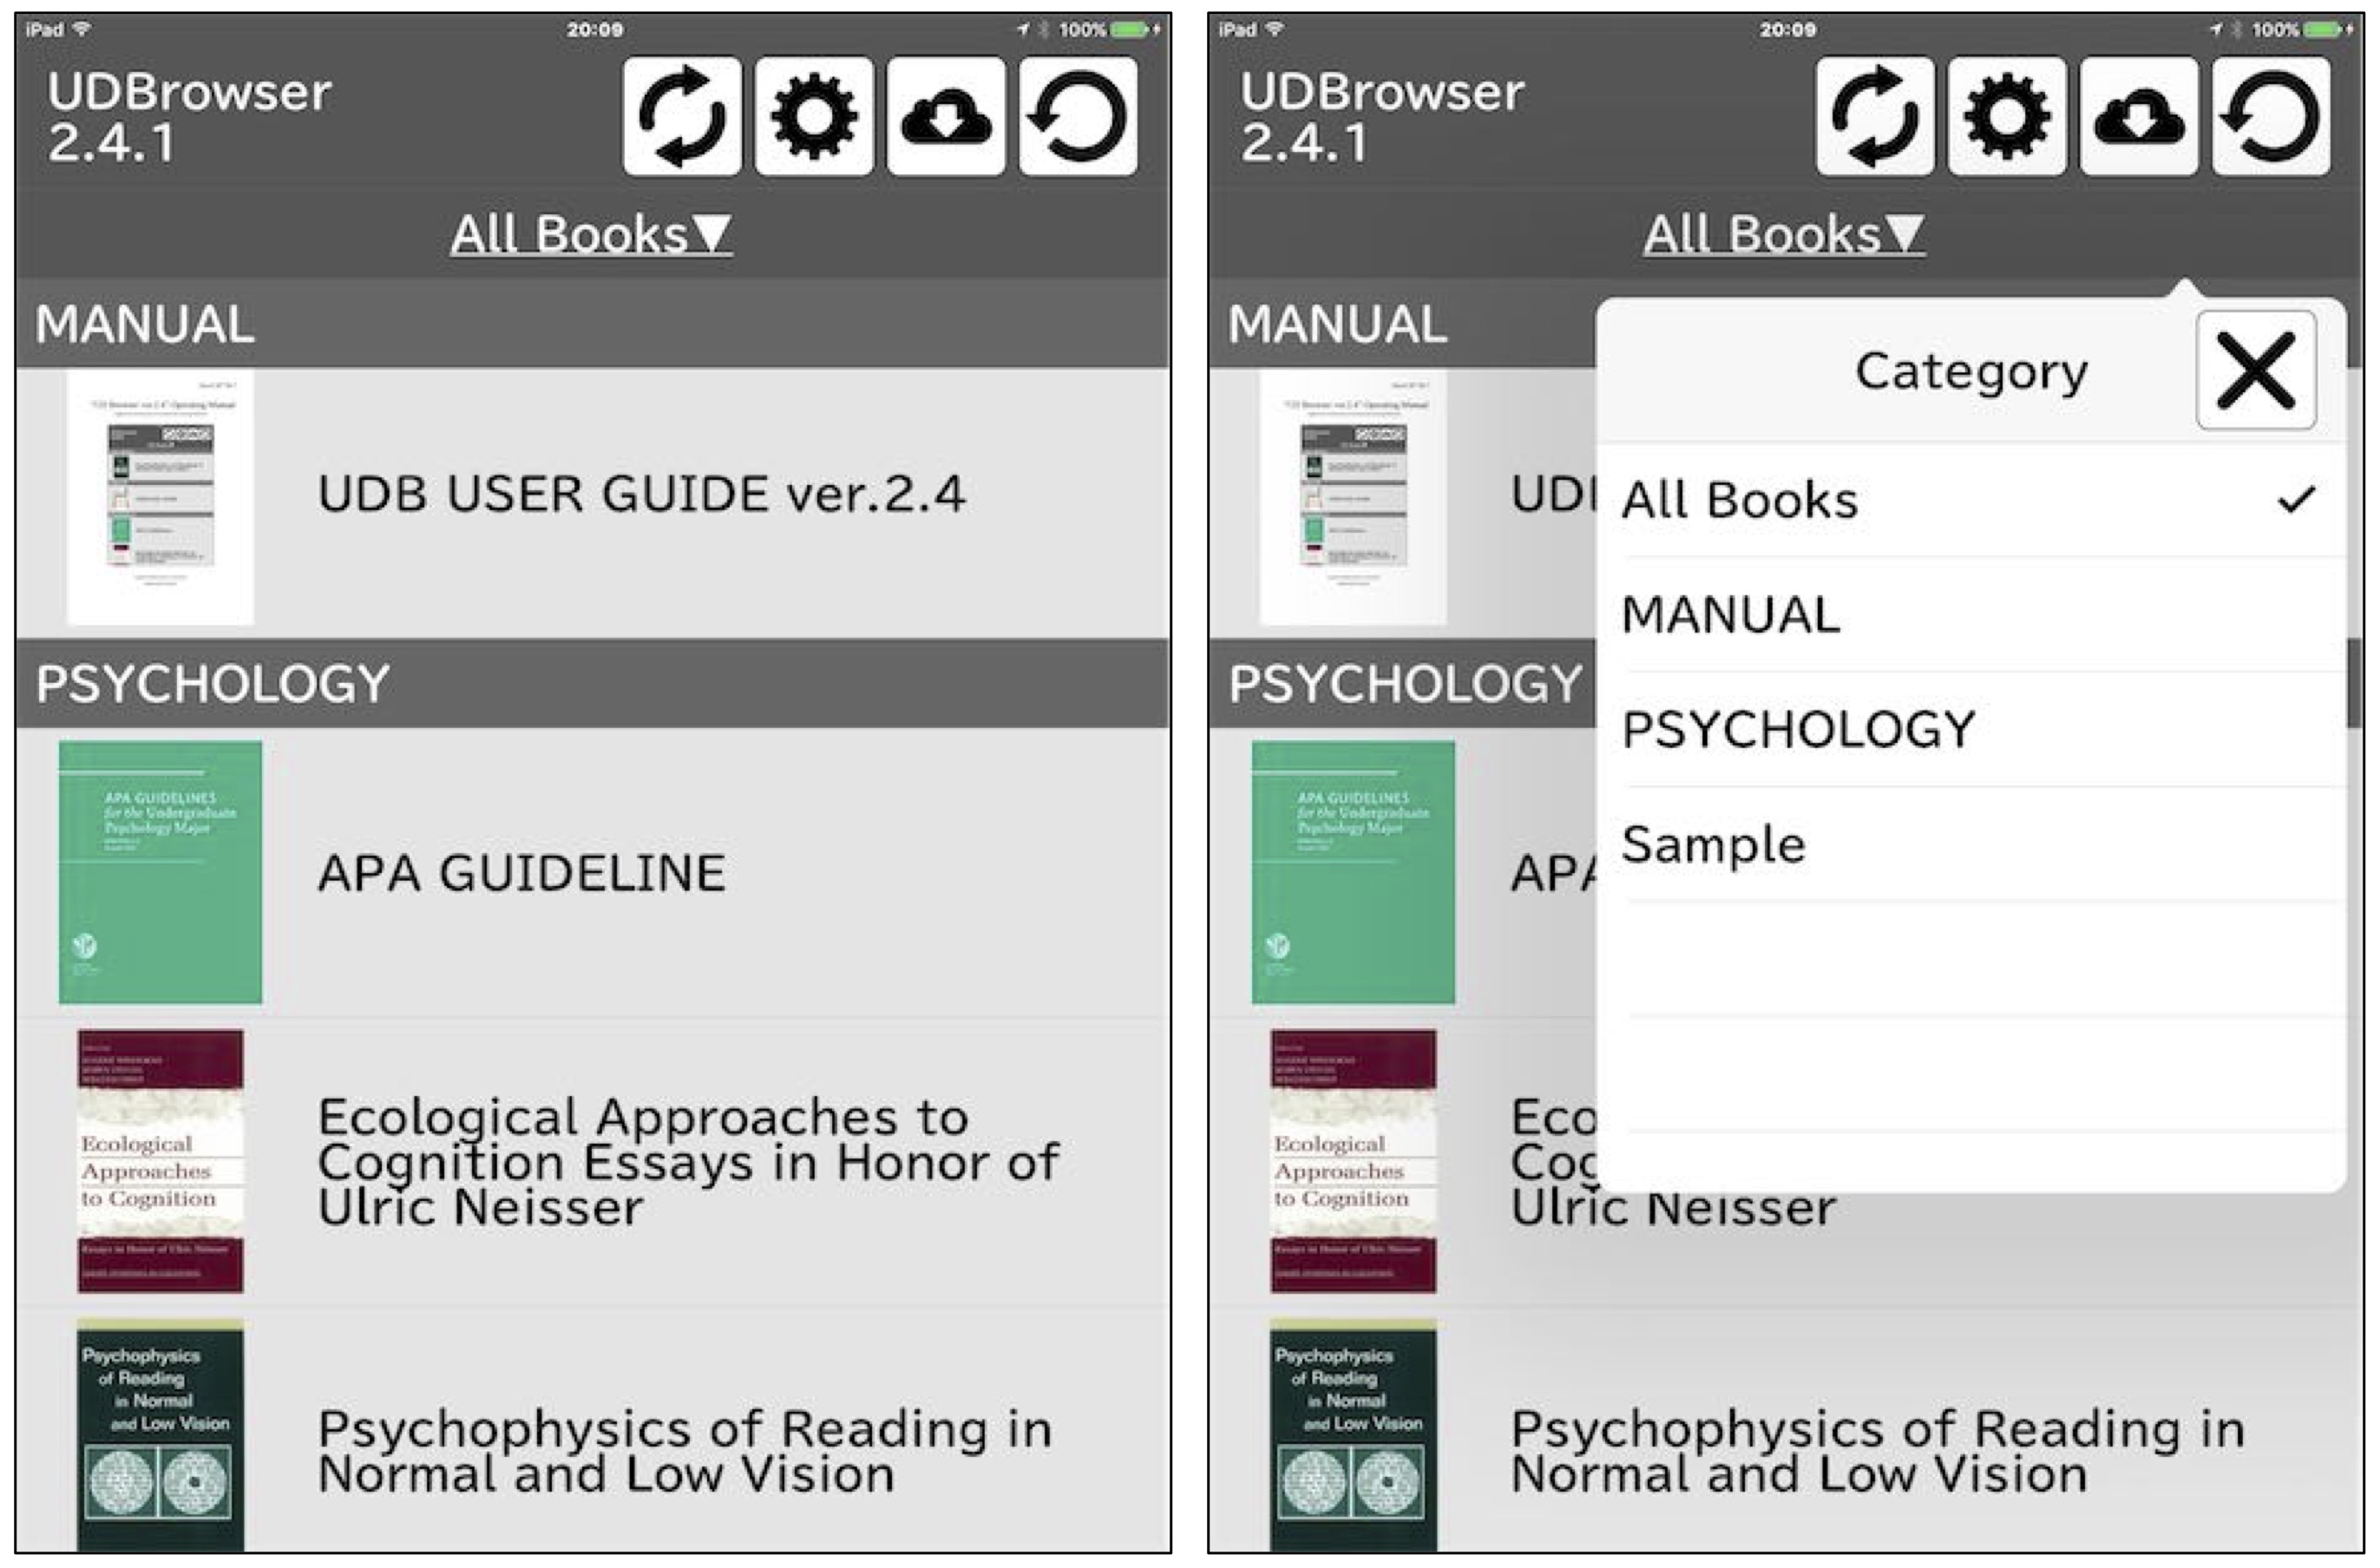
Figure 2 Document Selection Screen=Library
By selecting the text book, the cover page of the text book is displayed (figure 3). In figure 3, the menu is displayed at the top of the cover page. If the cover page screen is tapped once, you jump to the Table of Contents screen. To use this function, it may necessary to create a link on the PDF.
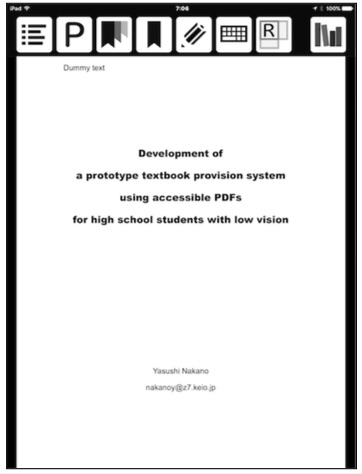
Figure 3 Cover Page Example (Menu Display ON)
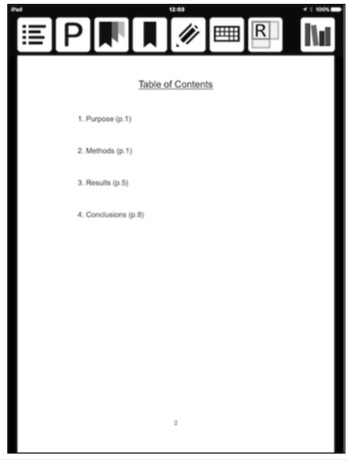
Figure 4 Example of Table of Contents (Menu Display ON)
When an area on the screen other than the cover page is tapped, the menu is displayed on the top section. This disappears if you tap again. The eight functions in the menu are “Table of Contents”, “Page Jump”, “Review Stored Bookmarks”, “Bookmark”, “Annotation”, “On-Screen Keyboard”, “Change to HTML/Reflow Mode” and “Library” (figure 5).
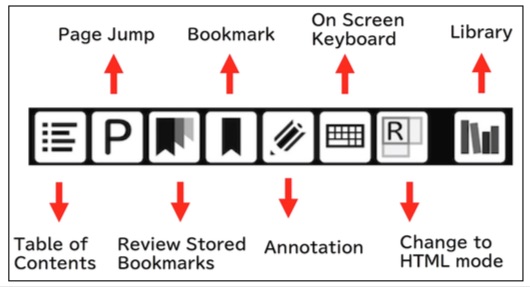
Figure 5 Menu Functions
When you tap the “Table of Contents” icon at the left edge of the menu, you will jump to the table of contents (figure 6). You may need to set up links to the PDF so that if you tap the items from the PDF’s table of contents such as “Sample text book”, you will jump to each source.
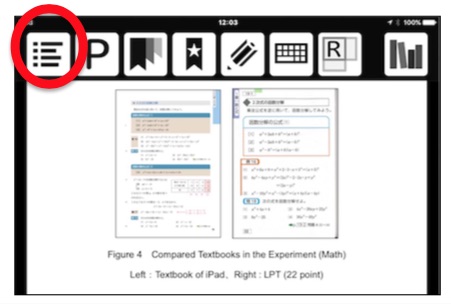
Figure 6 Table of Contents Page
When you tap the “Page Jump” icon second from the left on the menu, a screen shall be displayed to input the page number as shown in figure 7. If you enter the number of the page you want to open and tap “OK”, you will jump to the designated page (for example, if you input “15” and click “OK”, you will jump to page 15).
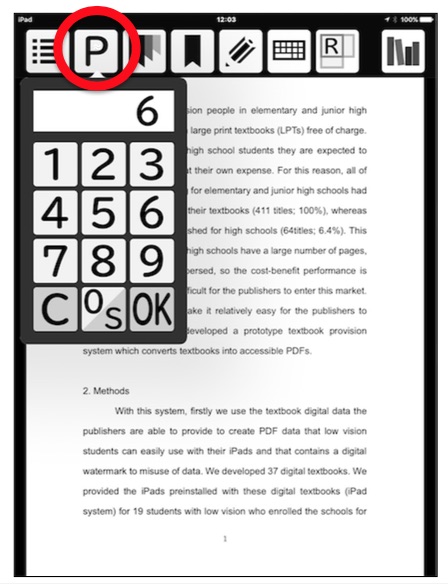
Figure 7 Open the Designated Page
It is possible to insert a bookmark for pages you often use or pages that you will open in the next class. When you tap the “Bookmark” icon at the fourth from the left on the menu, a “☆”mark appears on the bookmark icon picture, and this indicates that a bookmark has been inserted in this page (figure 8).
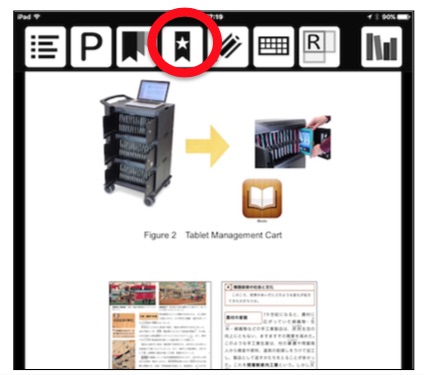
Figure 8 State in which a “Bookmark” has been Inserted
When you want to write annotation or highlight in the text book, tap the “Annotation” icon fifth from the left on the menu (figure 9).
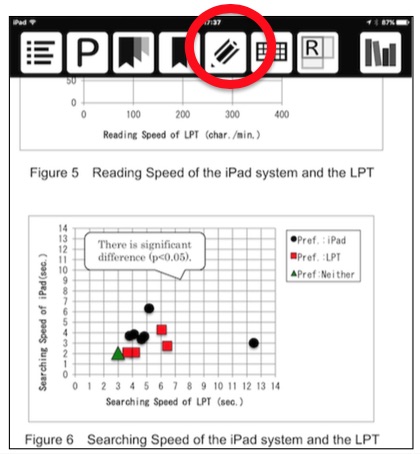
Figure 9 “Annotation” icon
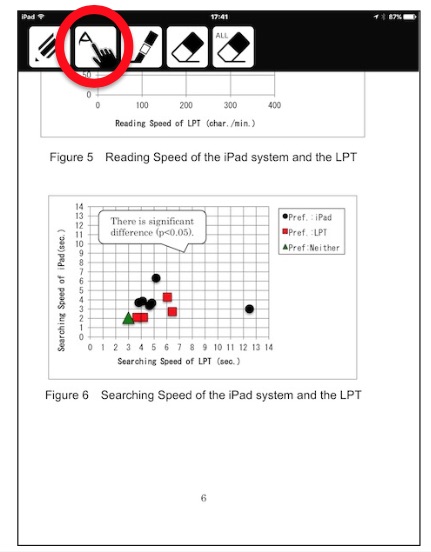
Figure 10 State in which the “Annotation” icon is Tapped
When you tap the “Handwriting” icon that is second from the left of the Annotate menu (figure 10), the sub-menu shall be displayed, and you can change settings for pen type, thickness and color (Figure 11, 12, 13, 14). Furthermore, after you have selected your settings, you can return to the original screen by tapping the “Return” icon.
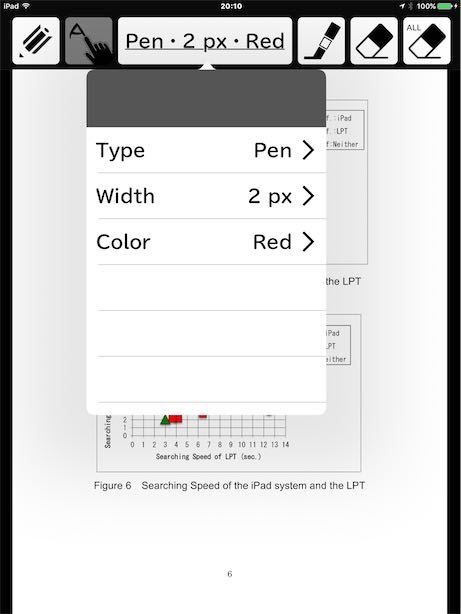
Figure 11 “Handwriting” Icon Sub-menu
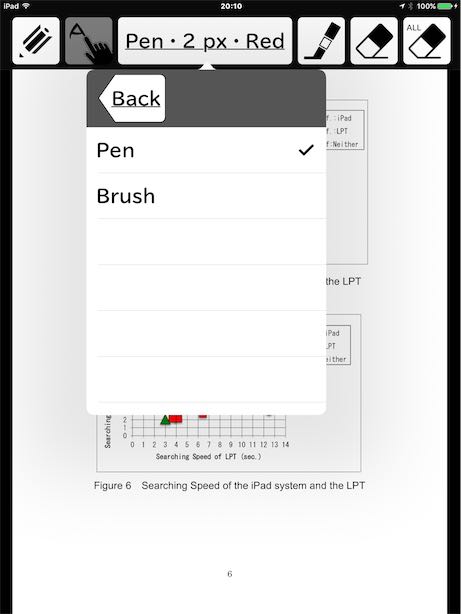
Figure 12 “Handwriting” Pen Type Setting Screen
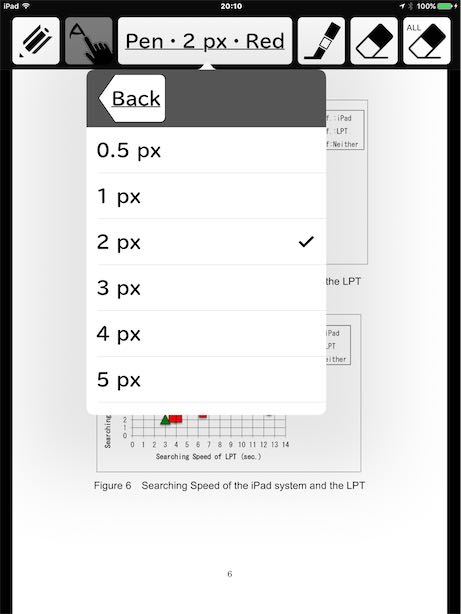
Figure 13 “Handwriting” Line Thickness Setting Screen
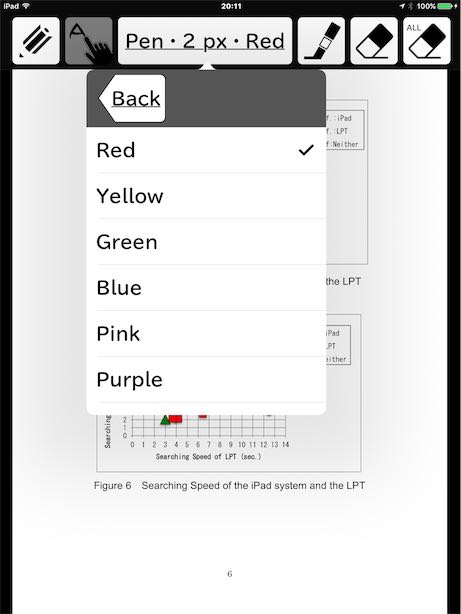
Figure 14 “Handwriting” Color Setting Screen
When we tried selecting the “pen” type, thickness “3px”, and color “red”, and annotate using “handwriting” in the text book, the screen would look like figure 15.
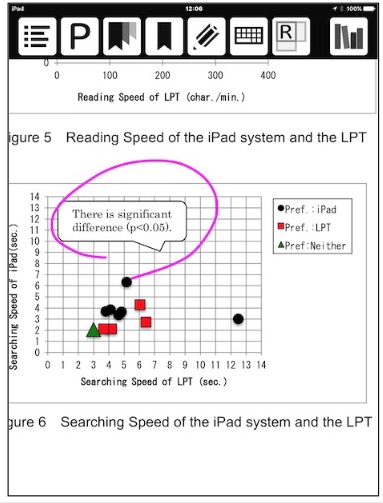
Figure 15 State Annotated with “Handwriting”
After annotating, when you tap the “Annotation” icon on the top left of the screen again, “Annotate” mode shall close. Further, when you wish to highlight with a “Marker(Highlighter)”, tap the “Annotation” icon, and tap the “Marker(Highlighter)” icon third from the left in the Annotate menu. When you tap the “Marker(Highlighter)” icon, the highlight color is displayed in the sub-menu on the side (figure 16). When you tap the “Color” icon, you can select the “Marker(Highlighter)t” color (figure 17).
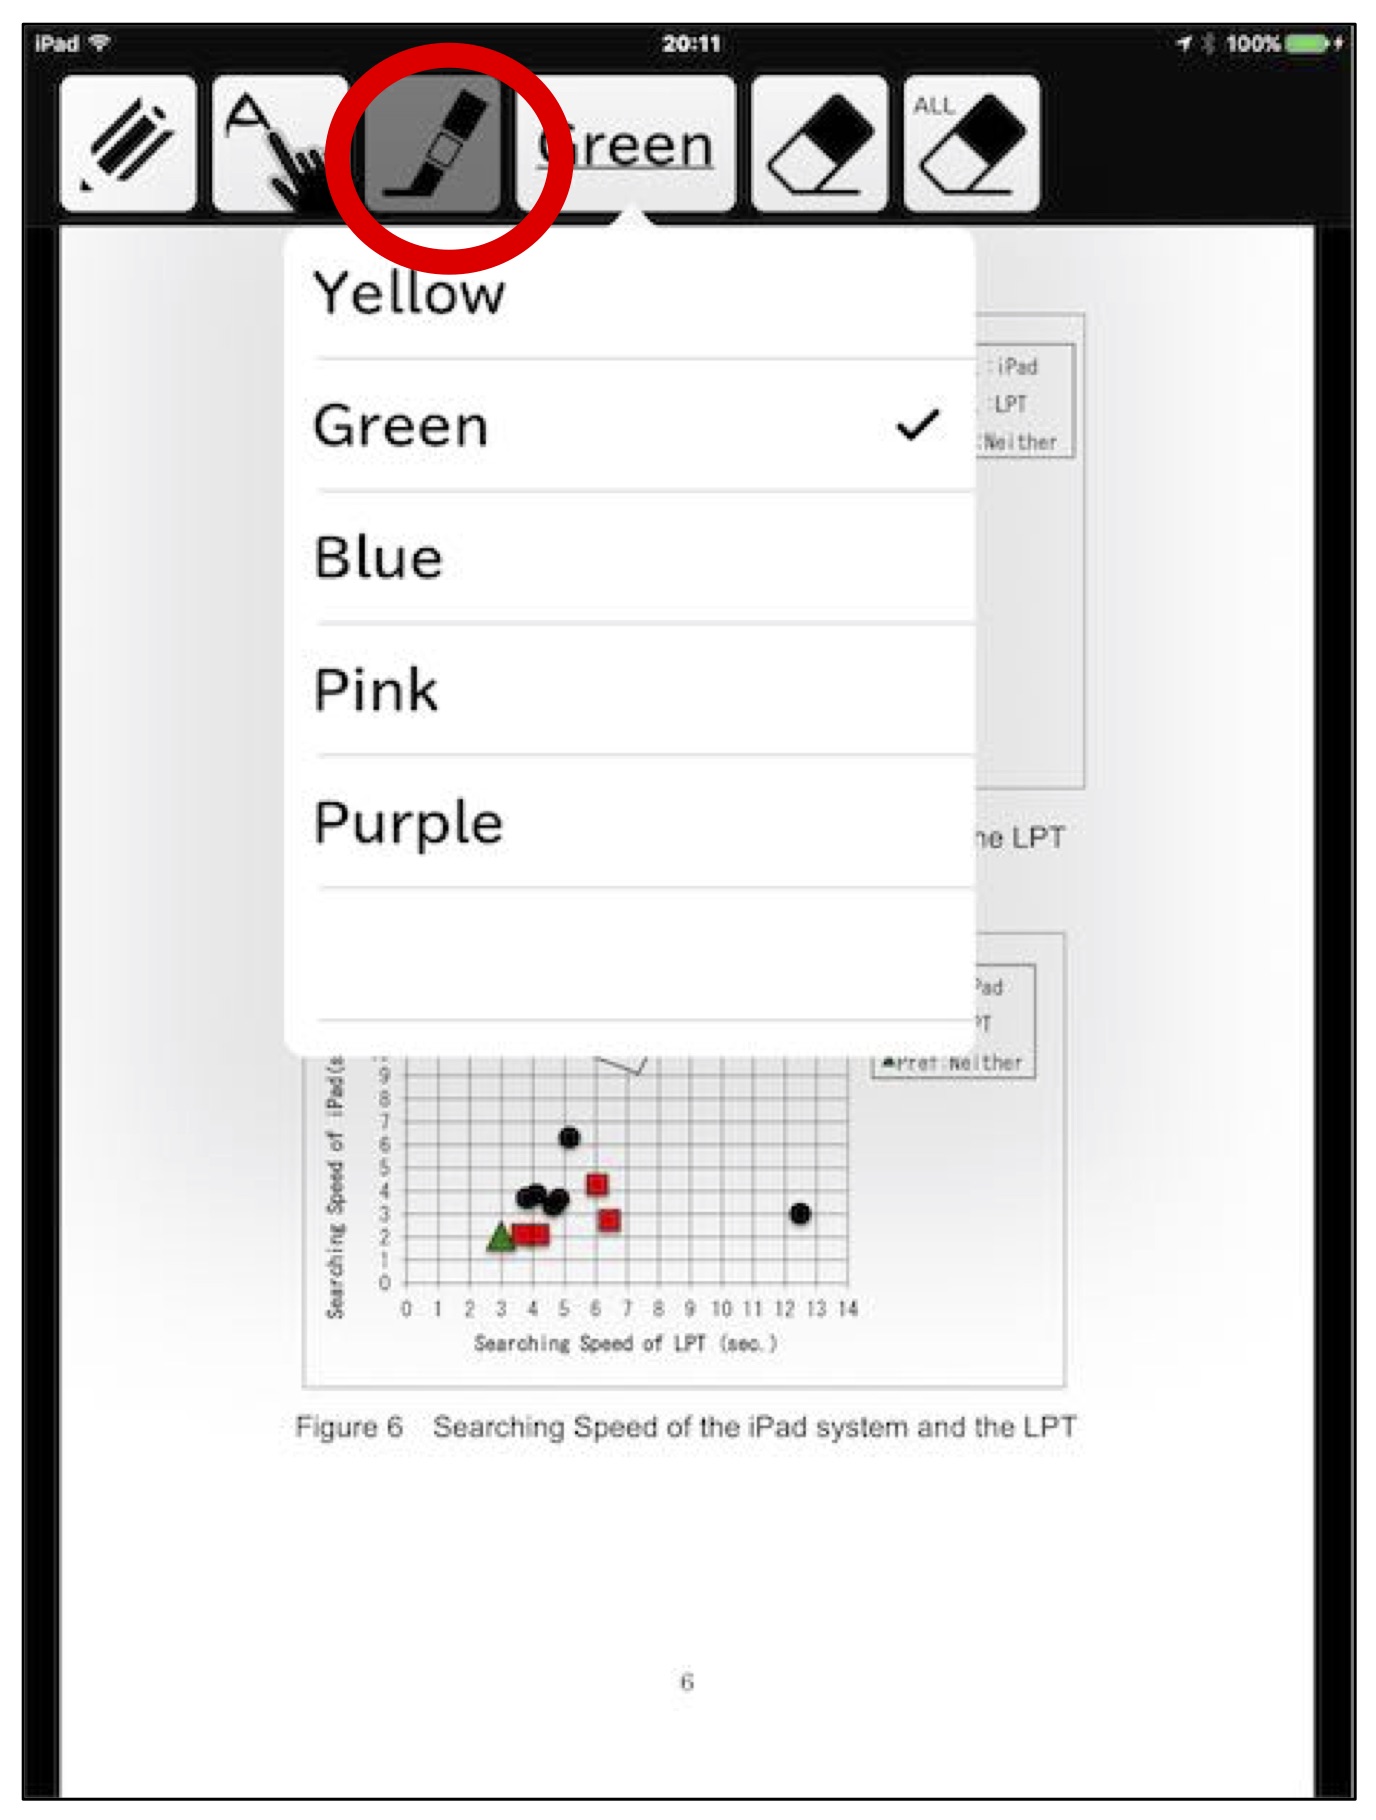
Figure 16 State in which the “Marker(Highlighter)” Icon is tapped
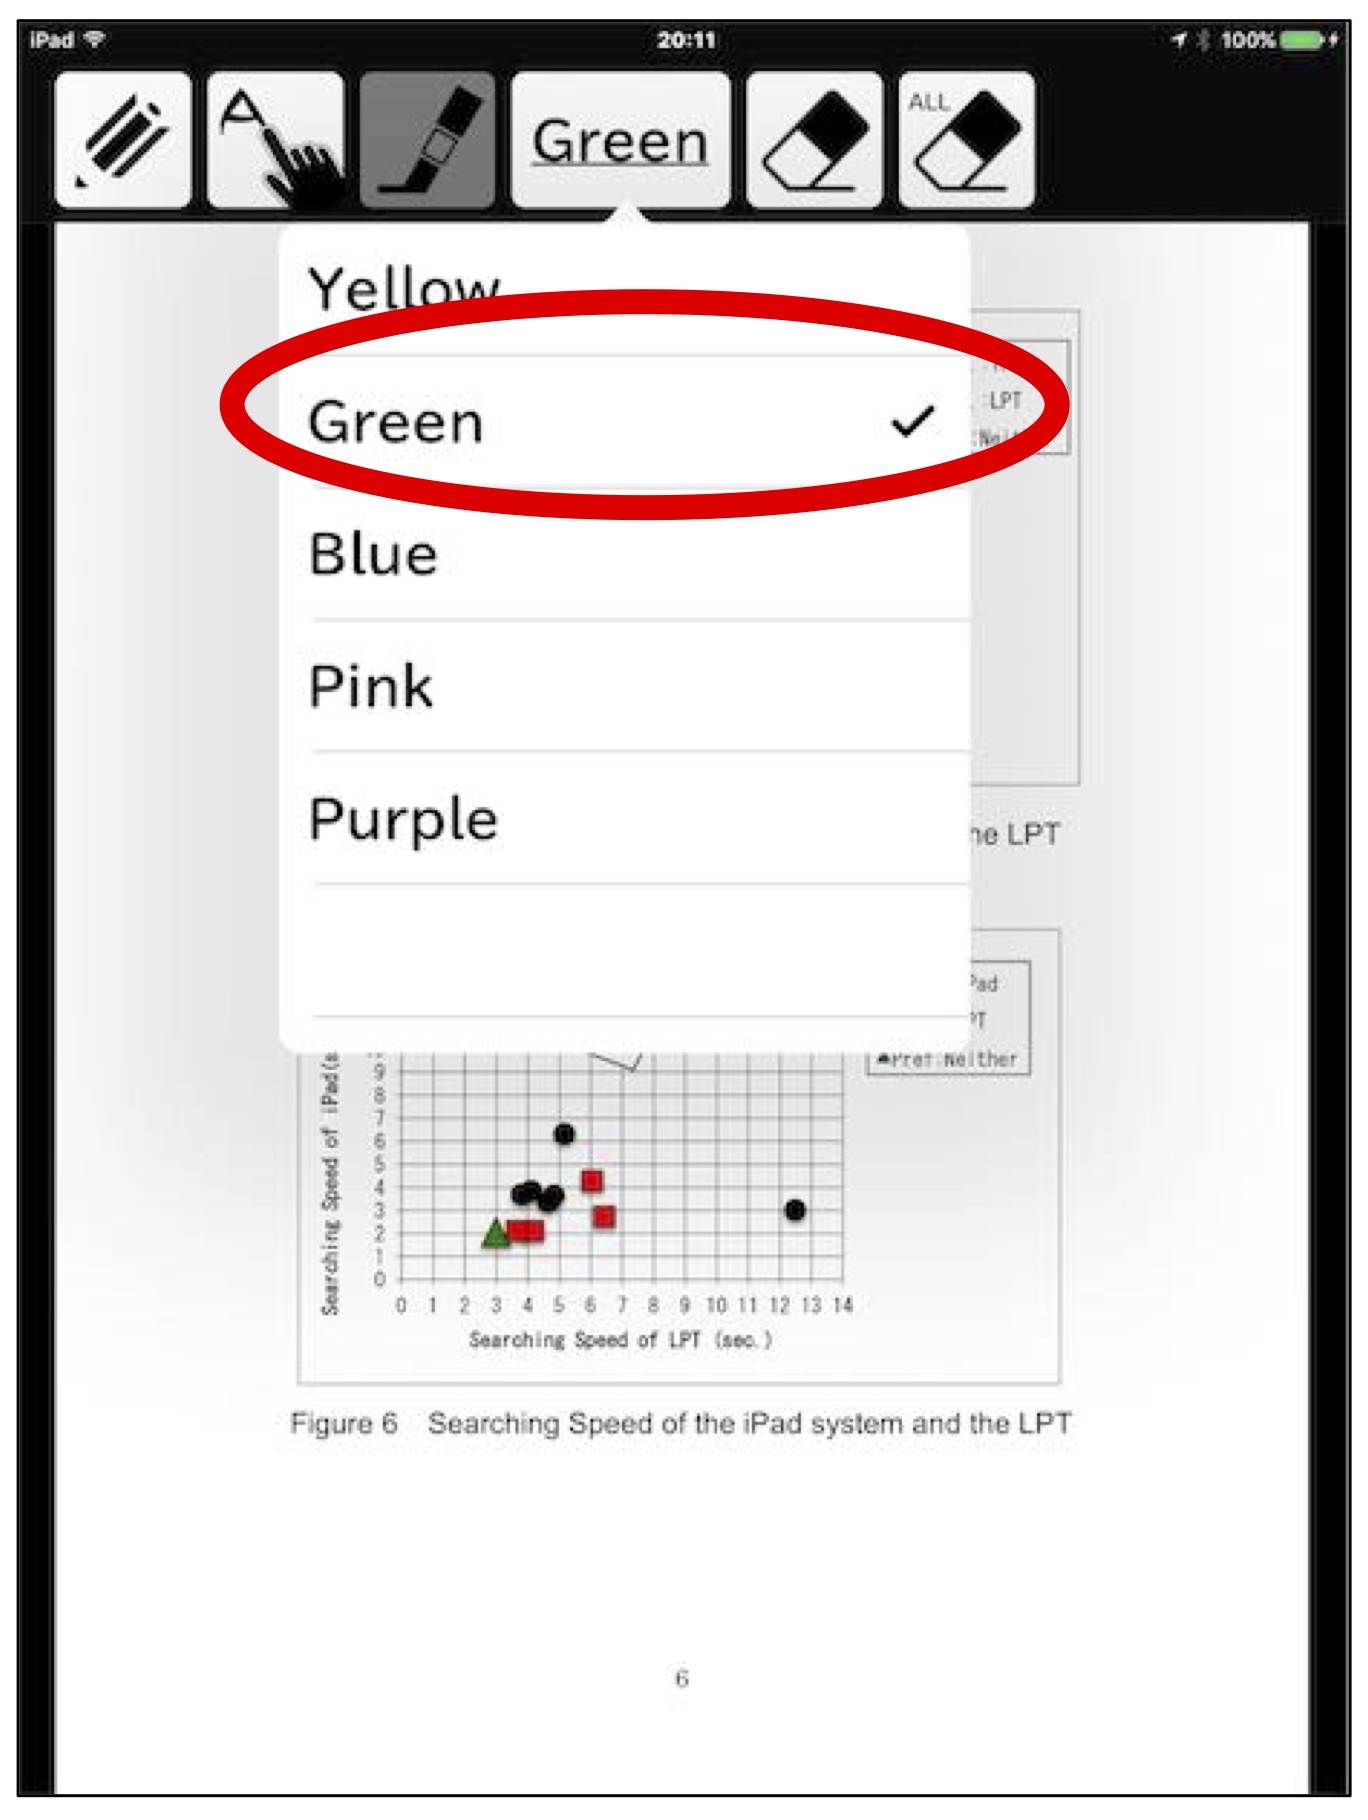
Figure 17 “Maker(Highlight)” Color Selection Screen
You can choose the “Marker(Highlighter)” color, and highlight/select the characters in the text book.
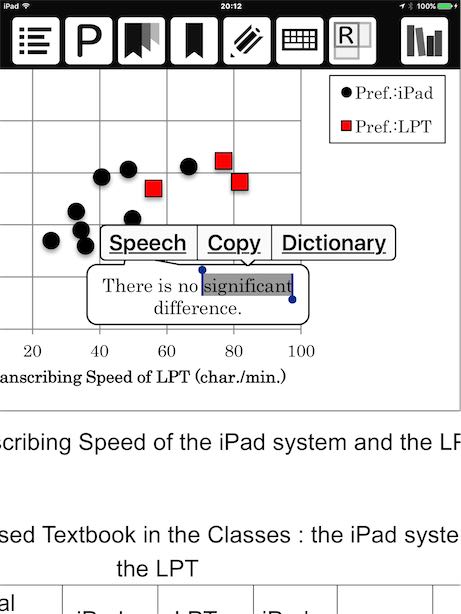
Figure 18 State in which the “Marker(Highlighter)” is Drawn
When you press the “Annotation” icon again after using the “Marker(Highlighter)”, the Annotate mode will close. When you tap the “Eraser” icon fourth from the left in the menu and select the area you wish to erase, you can erase the “Handwriting” and “Marker(Highlighter)” you have previously attached.
Further, if you tap the “Eraser ALL” icon (figure 19) on the Handwriting menu, it allows you to choose and erase from “Marker(Highlighter)”, “Handwriting”, “All”, “Cancel” on this page.
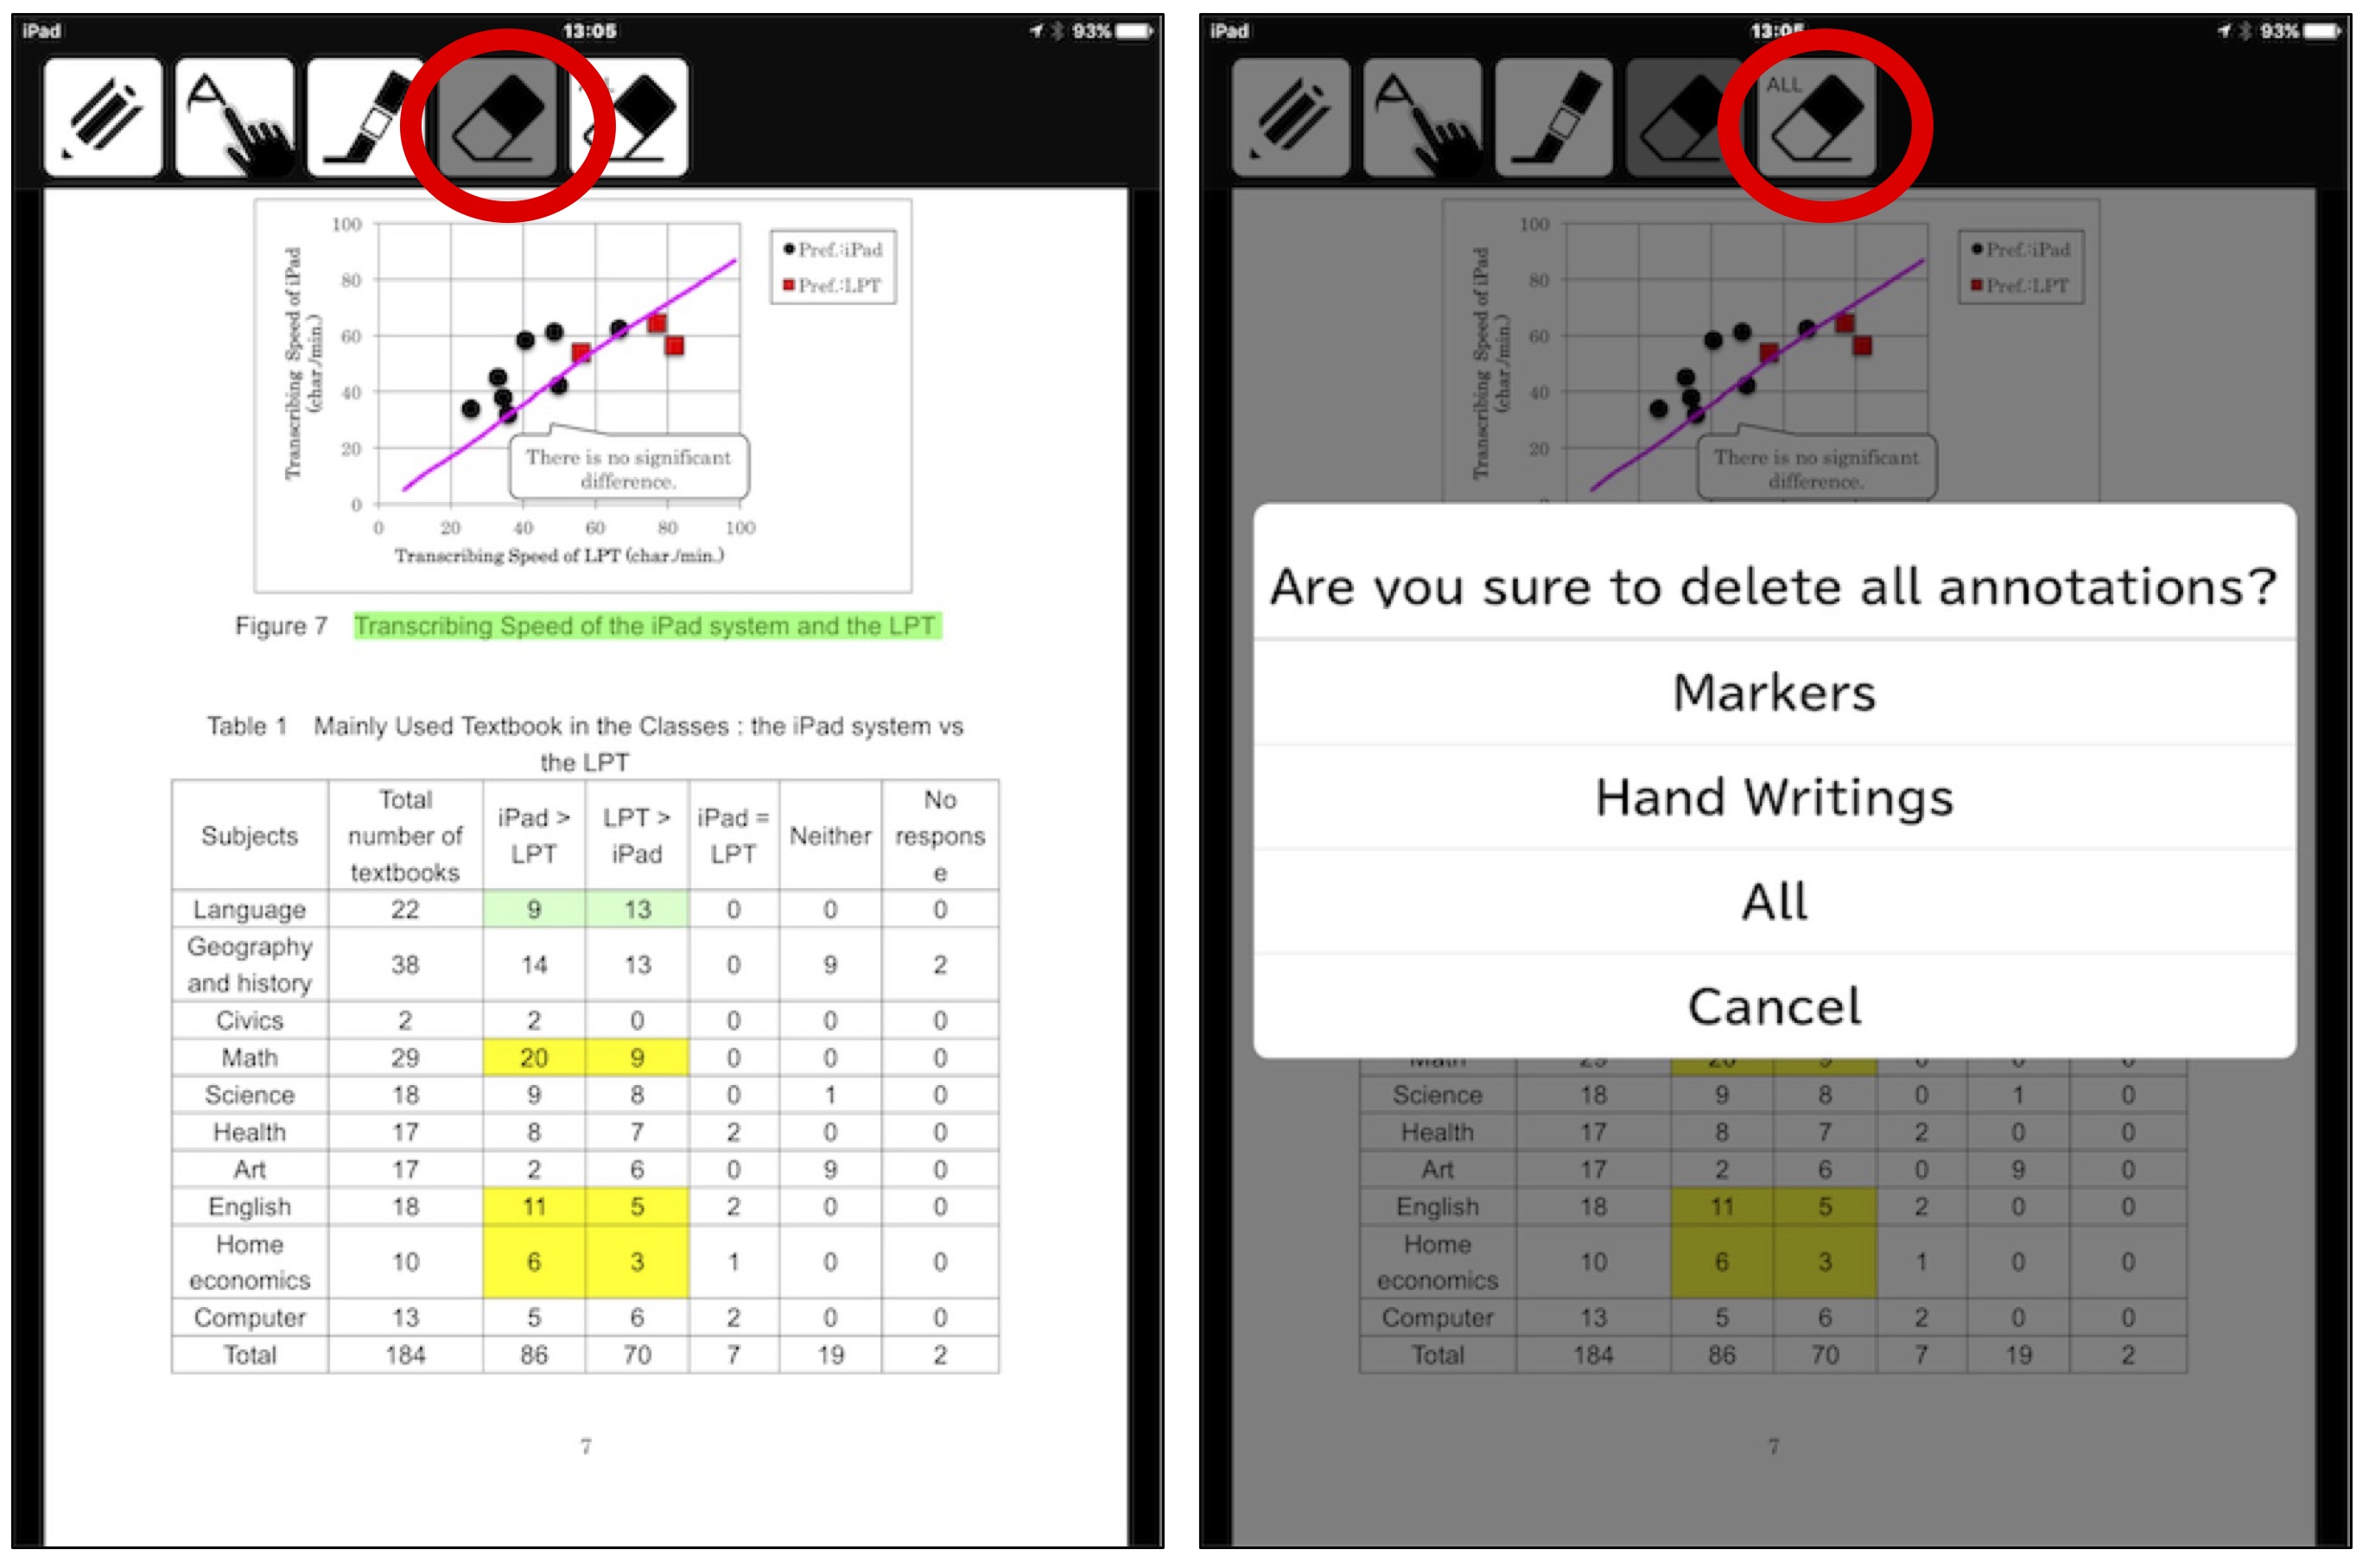
Figure 19 “Eraser” and “Eraser ALL”
To display pages in which “Bookmarks” have been inserted, tap the “Bookmark list” item third from the left on the menu, and tap the “BOOKMARK” icon on the top left. This will display the pages in which “Bookmarks” have been inserted as shown in figure 20. When you select a page number, the page will display, and tapping the “x” icon takes you back to the original page.
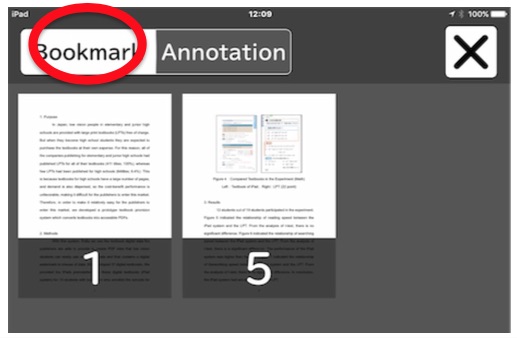
Figure 20 Bookmark List (Displays Pages in which “Bookmarks” are Inserted)
Further, when you click the “Annotation” icon, the pages with “Handwriting” and “Marker(Highlighter)” are displayed (Figure 21) 。
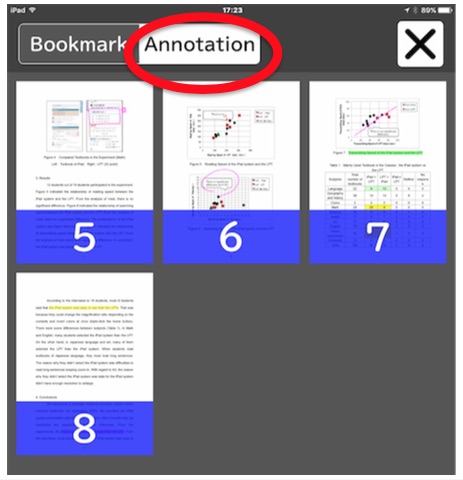
Figure 21 Bookmark List (Displays the “Handwriting” Page)
When you press on the selected words and text for about 2 seconds in the text book, the “Speech”, “Copy” and “Dictionary” menus will be displayed (figure 22). When you tap “Speech”, the voice will be played. The volume of this can be adjusted using the volume button on the right side of the iPad. When you tap the “Copy” button, the text can be copied to other apps etc. Further, when you tap “Dictionary”, you can search for the meaning of the selected words.
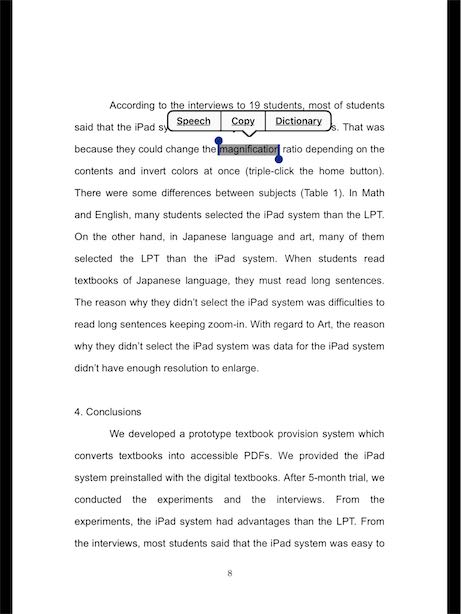
Figure 22 “Read Aloud” Selection Screen
When you tap “Dictionary”, the dictionary search results shall be displayed (figure 23). When you tap “Done” icon on the top right in the state in figure 23, it will return to the original page. If the dictionary characters are too small, double tap with 3 fingers and enlarge the screen (to return it to its original state, double-tap with three fingers again).
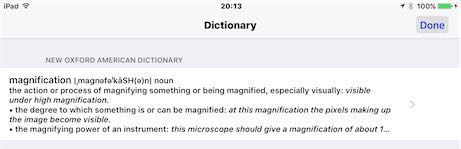
Figure 23 Dictionary Screen
The menu display is easier to use than the previous one when searching the dictionary or reading aloud. We are making efforts not to display unnecessary menus so please check it out. Until now, the menu display of “Speech”, “Copy” and “Dictionary” was small and difficult to see, but with the “UD Browser” you can pinch out and expand, as shown in figure 24. It has also become possible to copy since ver.2.3.
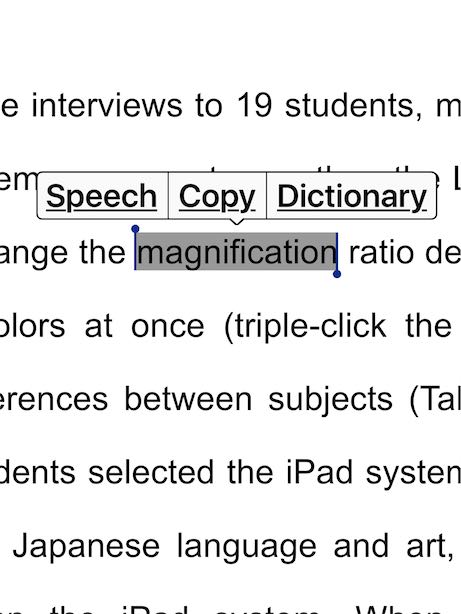
Figure 24 You can Pinch Out When Selecting Characters
The foremost feature of this app is that it can be displayed in HTML/reflow (figure 25). When you tap the “R” icon from the top menu, the page will be displayed in reflow.
When you enlarge the characters by pinching out on the PDF screen, the characters in the surrounding area move off the screen. On the other hand, with HTML/reflow, this is automatically adjusted the text will fit within the area displayed, in accordance with the number of lines on the page and number of characters within each line. Since ver.2.3, it has become possible to display the page in reflow, and the text-to-speech feature can also be used.
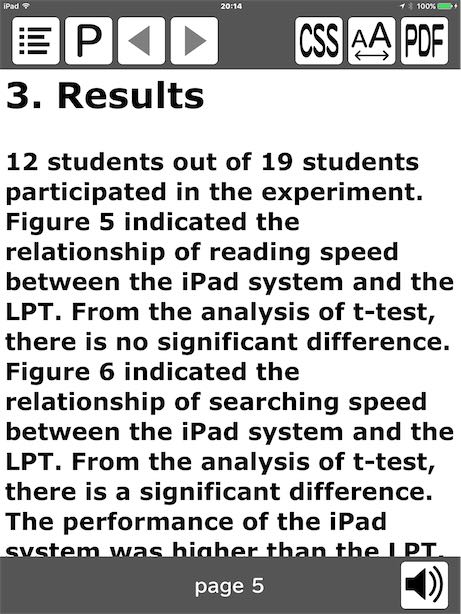
Figure 25 HTML/Reflow Screen
The menu on the HTML/reflow mode is as follows.
When you tap the “Table of Contents” icon on the top left, the reflow screen table of contents will be displayed. In the same way, as for PDF mode, if you tap the item you will jump to that page.
b) Follow the HistoryWhen you tap on the “◀” (return) icon second from the left, you can go back in the history. If you tap on the “▶” (forward) icon third from the left, you can move forward in the history.
c) Application of CSS (Cascading Style Sheets)When you tap the “CSS” icon item third from the right, the menu will be displayed, the reflow screen display font and background color can be chosen (Figure 26). For example, when you select “Arial white”, the background color is white and texts are in gothic typeface. When you tap the “CSS” icon again, the selected menu disappears. Furthermore, you can create your own CSS. When you forward CSS files you have created yourself (“filename.css”) to the UD browser, these will be added to the menu.
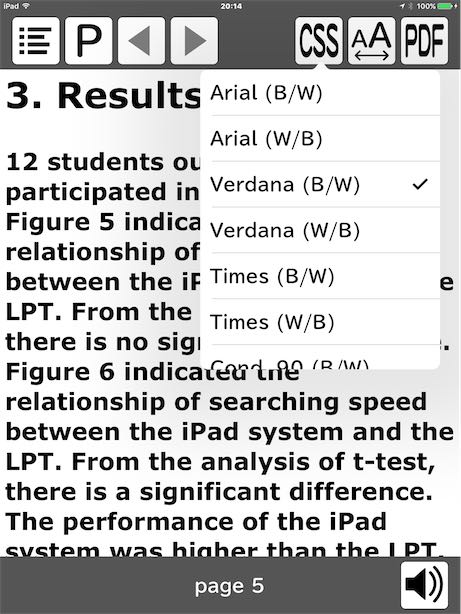
Figure 26 Font and Background Color Screen
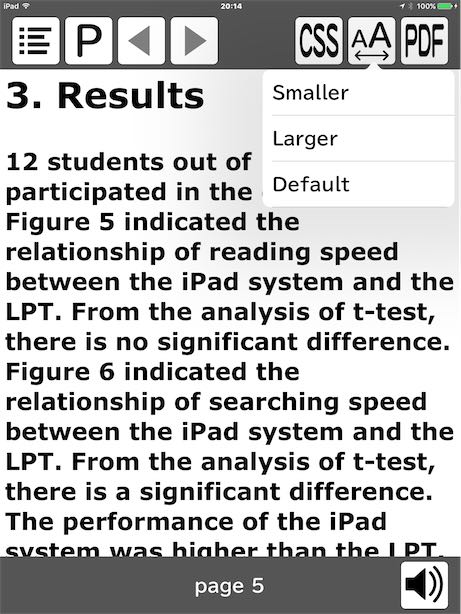
Figure 27 Font Size Change Screen
When you tap the “AA” icon item second from the right, the character size menu is displayed (figure 27). When you tap “Decrease (smaller),” the character size is reduced, whereas if you tap “Increase (larger),” the character size is enlarged. To return to the original state, tap “Default size”.
e) Switch over to PDF ModeWhen you tap the “PDF” icon on the top right, you will move to the PDF mode screen corresponding to the current HTML/reflow mode screen (figure 28). HTML data is required for the HTML/reflow mode.
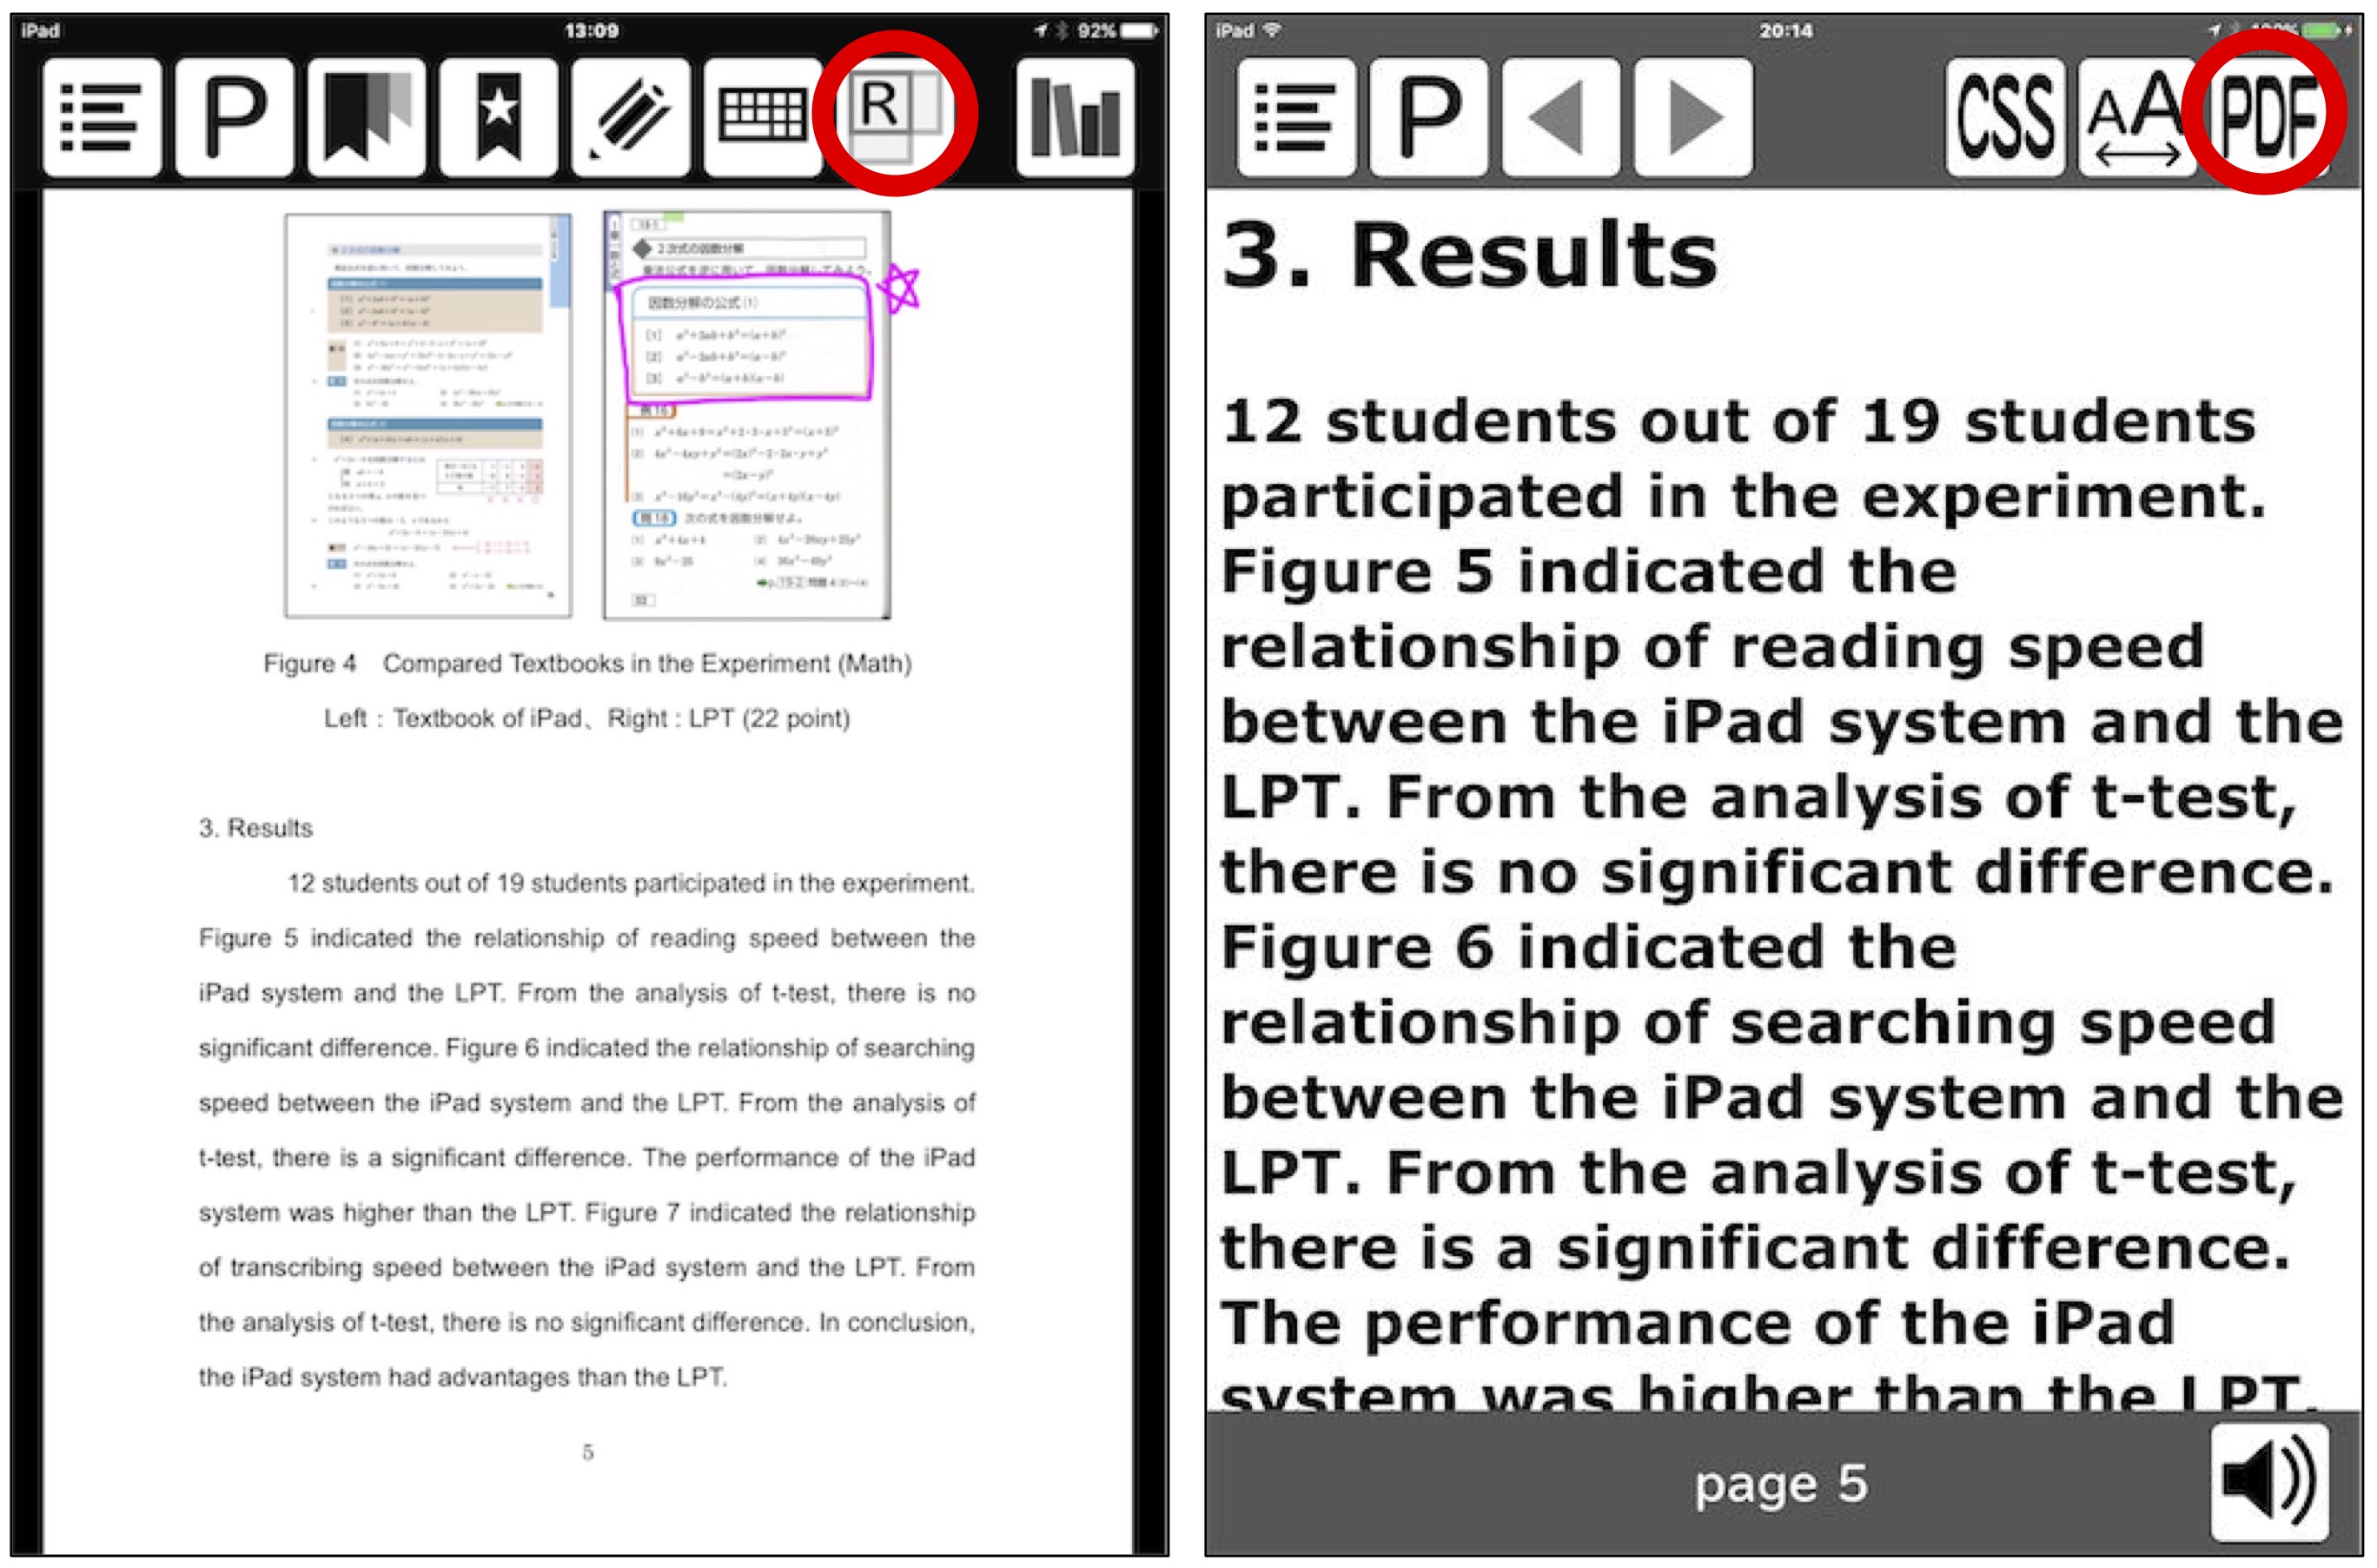
Figure 28 PDF Screen (figure on left) and HTML/Reflow Screen (figure on right)
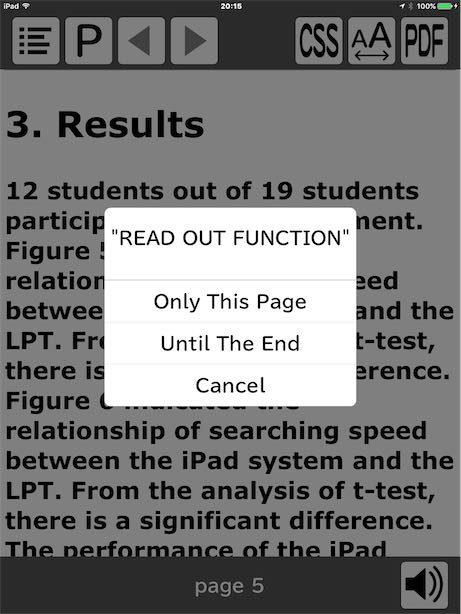
Figure 29 Read Aloud Voice Screen
When you tap the speaker diagram icon on the bottom right, the read aloud menu is displayed (figure 29). When you select “Speech this page”, this page will be read aloud. When you select “Speech from this page”, all pages from this one will be read aloud. When you wish for the device to stop reading aloud, tap the “■” icon.
Another feature of this app is that you can perform a line feed etc. from the keyboard. The screen can be controlled from the keyboard to move the XY table in the CCTV. With this function, the problem of unwanted movement when using the iPad can be improved. This improvement was made at the request of students at schools for the visually impaired. Being able to move the magnified screen horizontally and vertically, jumping to the right or left edge of the screen or being able to switch between full page display and magnified display. You can use either a keyboard that you can physically touch or an On-Screen Keyboard that displays a keyboard on the screen for you to use.
To display the On-Screen Keyboard, tap the “keyboard” icon item third from the right on the menu. The On-Screen Keyboard is displayed at the bottom of the screen, as shown in figure 30. The On-Screen Keyboard function is as shown in figures 31.
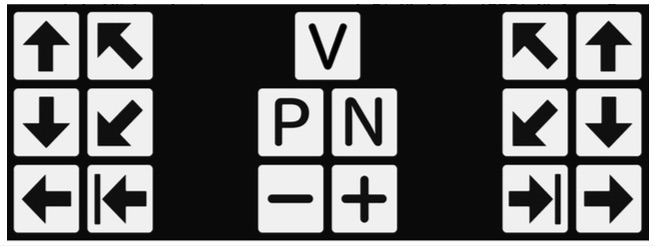
Figure 30 On-Screen Keyboard
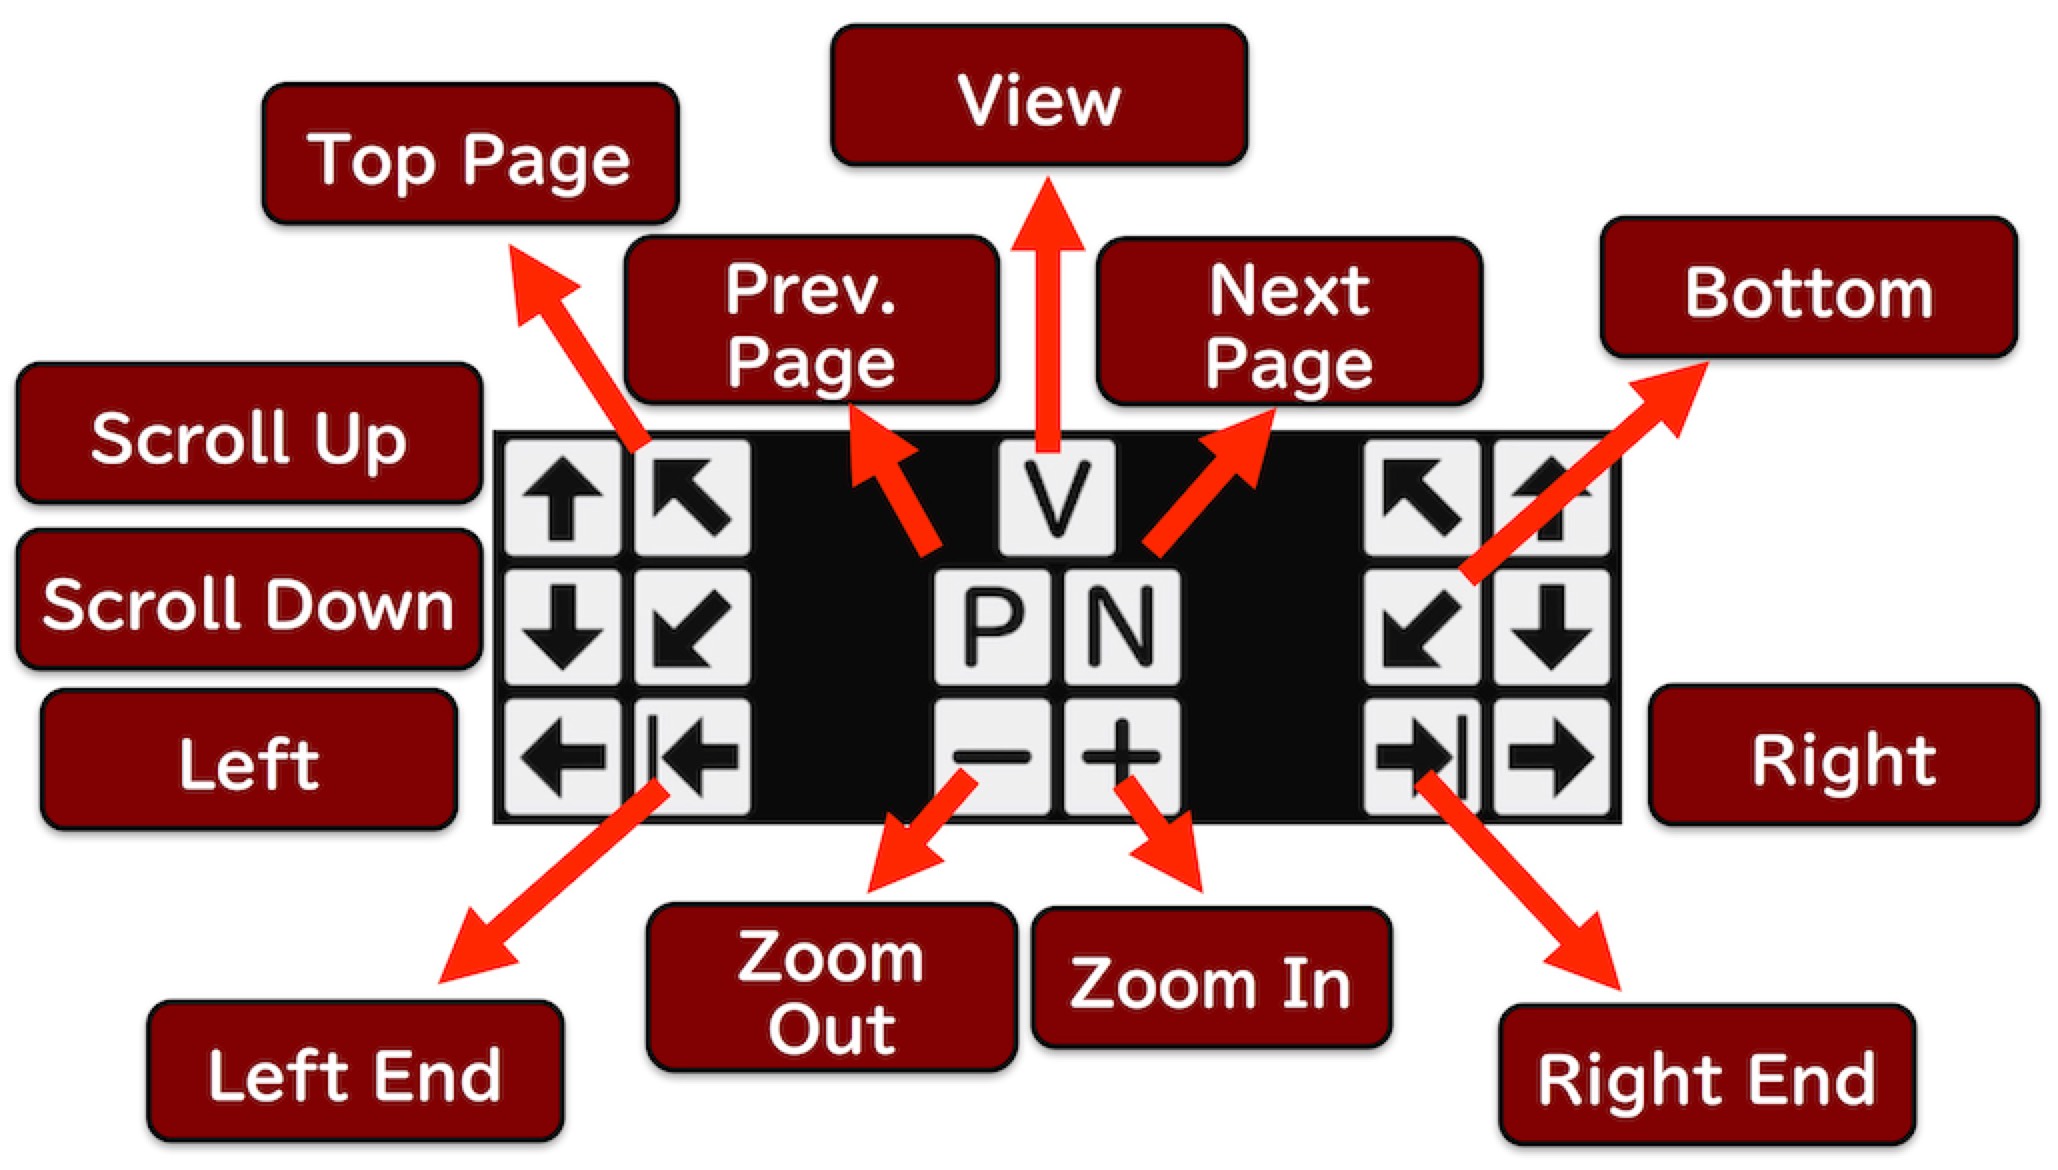
Figure 31 On-Screen Keyboard Functions
When using an external keyboard, such as Bluetooth etc., the app can be operated from the keyboard even if the On-Screen Keyboard is not displayed. Assignment of the functions is as follows. When using an external keyboard, be sure to put it in “English (US)” mode and ensure that “caps lock” is not on (input is in lower case).
There are two methods of forwarding data to the UD browser, namely the method of forwarding from the PC and method of using the WebDAV Server.
Connect the cable between the PC and iPad, and start iTunes on the PC. Click the iPad icon on the left of the screen that starts up. Following this, click “App” from the left list (figure 32).
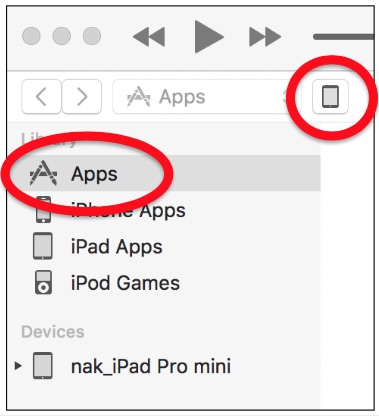
Figure 32 iTunes Screen(1)
When you click “App”, the PC iPad app list on the right side is displayed (figure 33). If you click “UD browser”, the “UD browser type” on the right is displayed. Scroll to the bottom of this document list and click “Add”. As doing this opens a separate window, select the file you wish to add and click “Add” again.
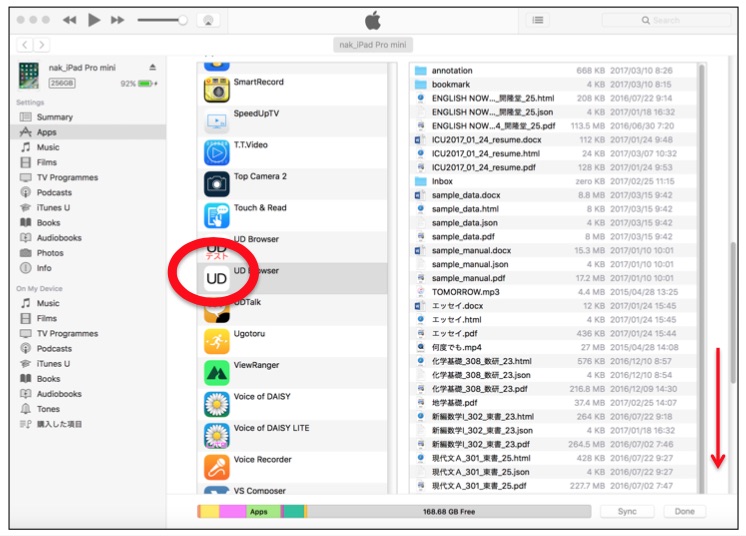
Figure 33 iTunes Screen (2)
After this operation, tap the “Update (reload)” icon on the top right of the Library screen and check that the added file appears on the library (figure 34).
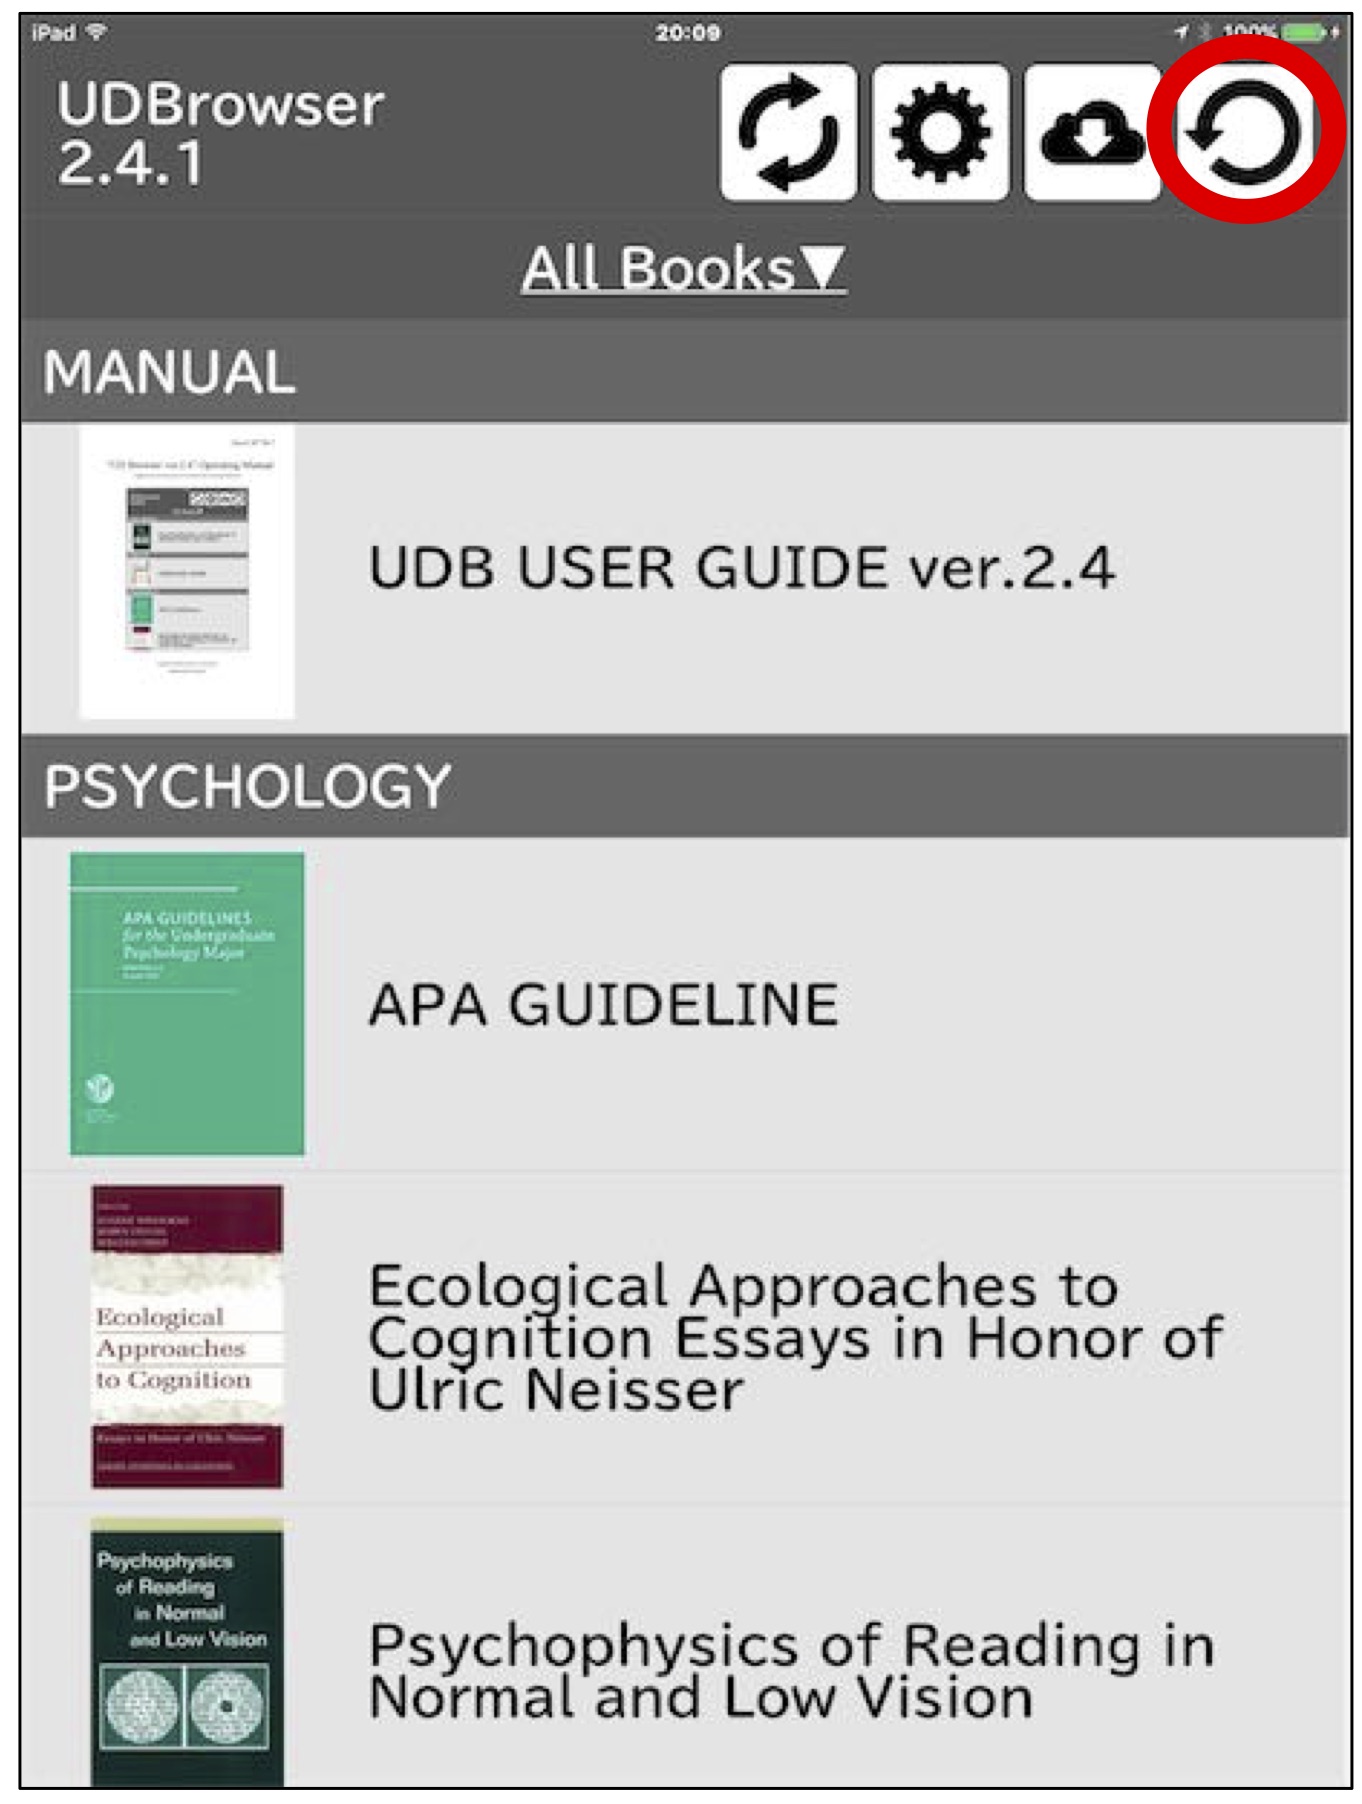
Figure 34 Library Update (Reload) Icon
Finally, click the iTunes eject icon on the PC and remove the cable.
Make the PDF file and HTML files the same file name other than the extension. As the HTML file is compatible with HTML5, you can link to images and videos.
This app supports transferring data from a cloud storage. Tap the “Cloud” icon that appears in the Library when starting the UD browser (figure 35). Then, a list of the cloud services that can be used are displayed (figure 36).
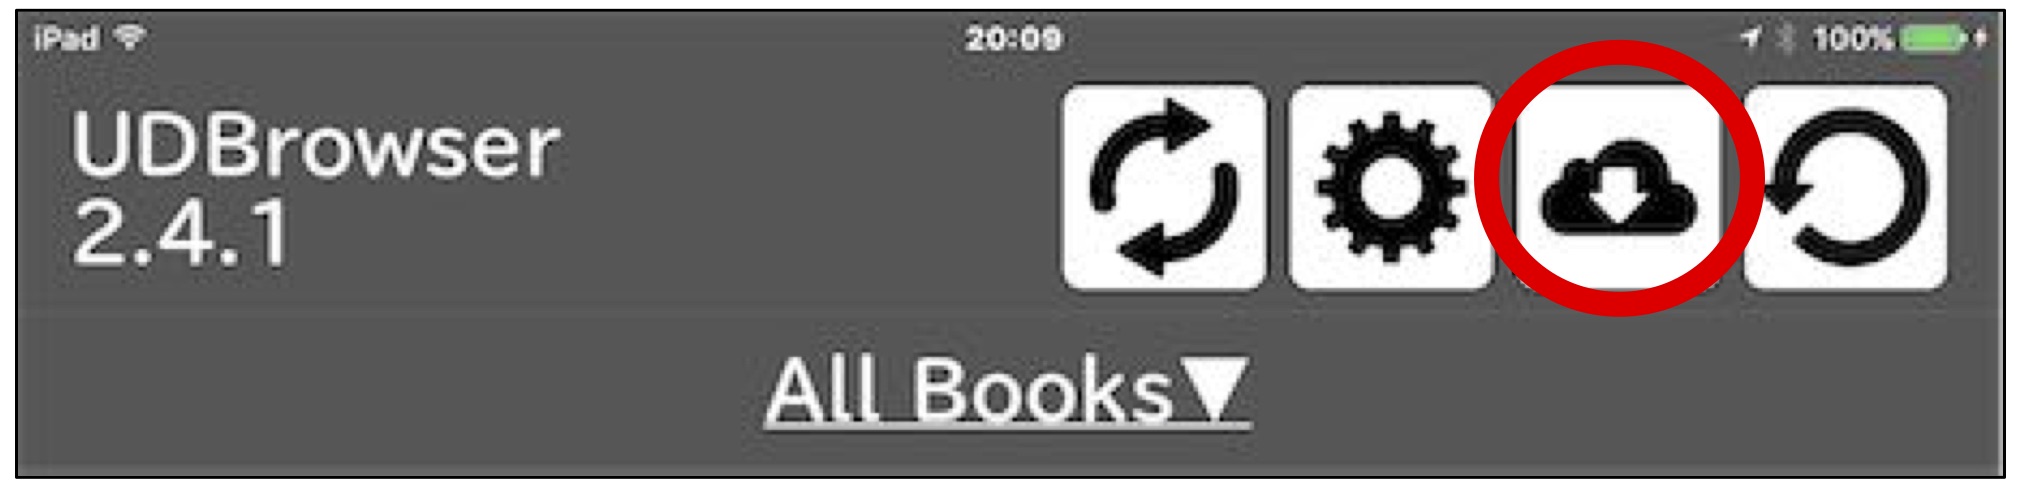
Figure 35 Library “Cloud” Icon
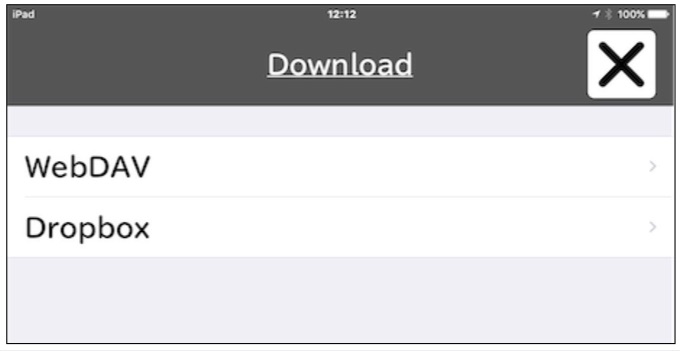
Figure 36 Server Selection Screen
Select the WebDAV Server, and if the Server address is not set, the error message shown in figure 37 is displayed. Click the “OK” button.
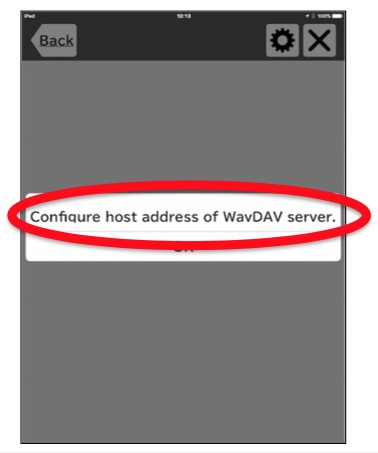
Figure 37 Error Message When Server Not Configured
Where the WebDAV Server address etc. is set, tap the WebDAV Server/menu “default settings” icon (figure 38). If so, the setting screen shown in figure 39 is displayed.
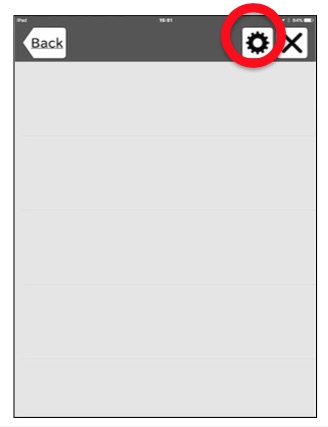
Figure 38 “Default Settings” Icon for Cloud Service
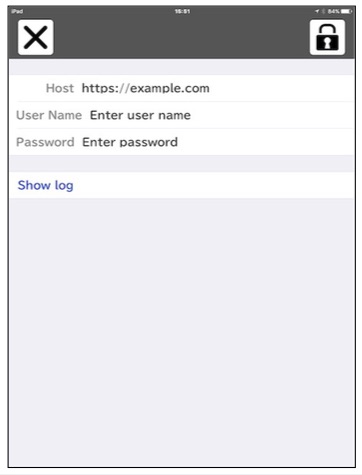
Figure 39 WebDAV Server Setting Screen
Enter host name, user name and password for the WebDAV Server you want to use, and tap the “Key” icon.
When you are connected to the Server, the file name list is displayed. Tap the necessary file to start the download. Once the download is complete, tap the “Return” button and return to the Library. Then, when you tap the “Reload” button, the downloaded file will be returned to the Library. To use the UD browser functionality to the fullest, you need the three file types of HTML、PDF and JSON, but it will run with just HTML and PDF.
b) DropboxIf you have a Dropbox account, by selecting Dropbox and tapping Approve, you can connect to Dropbox and transfer files (figure 40).
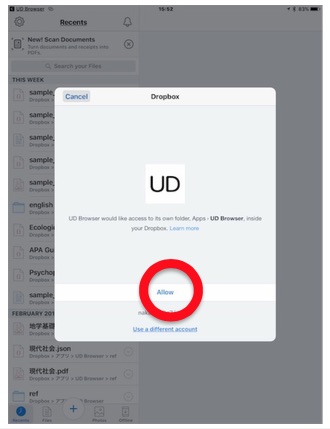
Figure 40 Access Screen to Dropbox
Further, when releasing the connection with Dropbox, tap the “Set” icon and tap the Dropbox connection release.
You can start up the app and perform default settings from the Library screen. When you tap the “settings” icon third from the right, the screen in figure 41 appears.
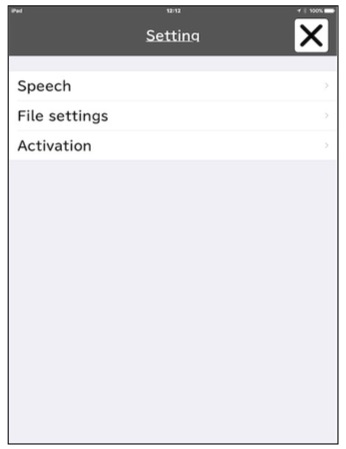
Figure 41 Setting Screen
When you tap “speech”, the voice and speed bar is displayed. When you tap “Voice”, 6 types of voices are displayed. Select and tap the voice that is easy for you to listen to. By moving the slide bar below the voice left and right, you can speed up and slow down the read aloud speed (figure 42).
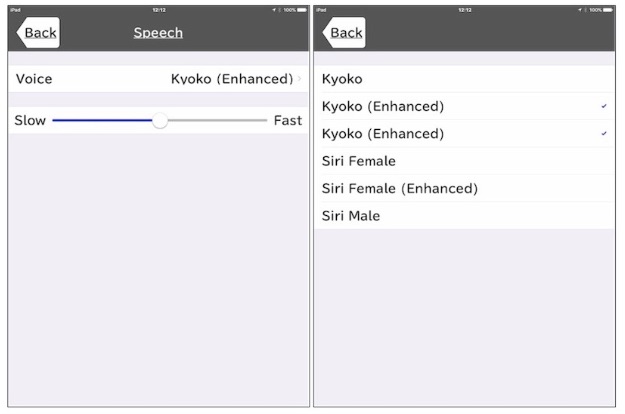
Figure 42 Speech Screen
When you tap the file settings, you can select HTML/reflow mode or PDF mode. If you set “Give Priority to HTML” to ON, you will return to the HTML/reflow mode (figure 43).
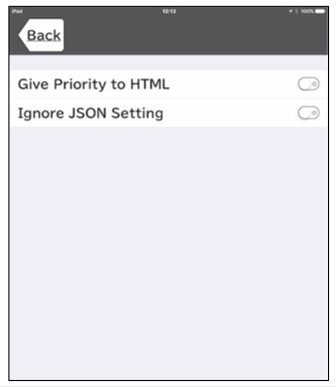
Figure 43 File Setting Screen
This app can be used with PDF files only or HTML files only. If both files are used, it is possible to switch between the two. Further, with the JSON file, it is possible to specify the start position of the PDF or location of the Table of Contents. The method of creating the various data files is described below.
This app is compatible with standard PDF files. PDF files can be created from a variety of PC software, such as Word and other document creation software, presentation software like PowerPoint and spreadsheet software such as Excel. It is also possible to use digitalized data, created from paper documents using scanners or cameras (to use functions such as dictionary search etc., you will need to be able to recognize characters, such as by using OCR software). Further, it is also possible to use PDF data obtained from the Internet or databases etc.
a) Method of document creation using document creation software etc. Save as a PDF when saving using Word and other document creation software, presentation software like PowerPoint and spreadsheet software such as Excel etc.
b) Method of creating using a scanner: Scan the documents using a scanner, and if the characters are recognized using OCR software, it is possible to create a PDF file that can search a dictionary etc.
c) Others: With this app, it is possible to use PDF files acquired through the Internet etc. For example, it is possible to use PDF files acquired by searching through a research database etc.
Documents such as text books and teaching materials are generally not counted in paper pages etc. For this reason, the PDF pages and actual booklet pages may become out of synch. Further, the way that the pages are turned differ for vertical and horizontal writing. We have prepared a JSON file to resolve these issues.
a) JSON file content: Create the JSON file with the encoding as “Unicode (UTF-8)” and the line feed type as “Mac (CR)”. An example of how to write the JSON file is given below.
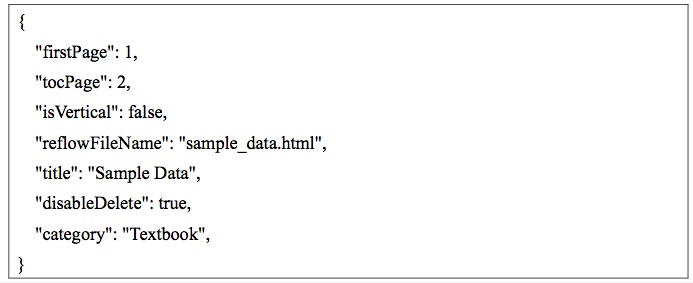
Figure 44 JSON File Description Example
b) FirstPage and tocPage: With “firstPage” you can specify which page of the PDF the first page of the document specifies. Further, with “tocPage”, you can specify what page of the PDF relates to the Table of Contents. For example, in the case of the following document, if we specify the “firstPage” as “2” and the “tocPage” as “3”, page jump and ToC jump will function correctly.
c) isVertical: When using a vertical writing document, specify “isVertical” as true. When using horizontal writing, specify as “false”.
d) reflowFileName: Basically, the same name is specified for the PDF file and HTML file, but set this item if you want to change the name.
e) title: When setting the title, it is possible to change the Library display. For example, even if the PDF file has the name “Self-created materials_Aug_2016Ver.pdf”, if you set “Self-created materials” for “title”, “Self-created materials” shall be displayed.
f) disableDelete: If you set this to true, this can be deleted from the Library. For important documents for which it would be a problem if they were deleted, set this to true. If this is set to false, or this item is described, this document can be deleted.
g) category: From ver.2.3, it is possible to classify the Library by category. To set this category, set “category”. For example, it is possible to display documents by category, such as “text book”, “teaching materials” and “others”.
This app is compatible with HTML5. Further, it is also possible to use CSS、JavaScript、and MathML. Hereafter, we shall only explain sections that differ from ordinary HTML files.
a) File requirements: For the HMTL files used in this app, set the encoding to “Unicode (UTF-8)” and the line feed type to “Mac (CR)”. The basic file configuration is as follows.
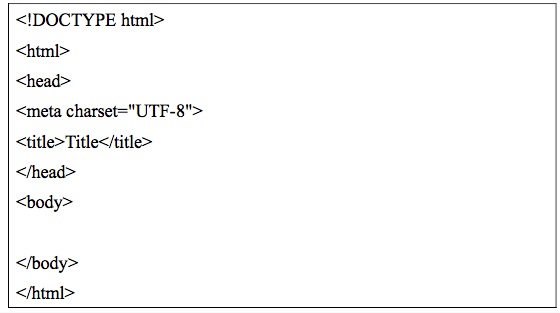
Figure 45 HTML Basic Configuration
b) Method of specifying page: There is no concept of pages within HTML, but with schools, as pages have important information, with this app, the page can be specified using the following method. Specify the description at the start of the page shown in figure 46 and figure 47. This should be described in half-size characters.
Figure 46 How to Write Page Tags

Figure 47 How to Write Page Tags When Specifying Page 2
c) Method of writing the table of contents: With this app, it is possible to jump to the table of contents. When specifying the table of contents, use the "id=”TOC”” tag (abbreviation for Table of Contents). For example, the Table of Contents section is described as follows (figure 48).

Figure 48 How to Write Tags When Specifying the Location of the Table of Contents
d) Others: As this is compatible with HTML5, you can also use hyperlinks etc. For this reason, it is
Since ver.2.3, it has been possible to automatically covert files created in Word to HTML. Forward the Word files to the UD browser using the iTunes or app forward function. Then press the convert button (figure 49).
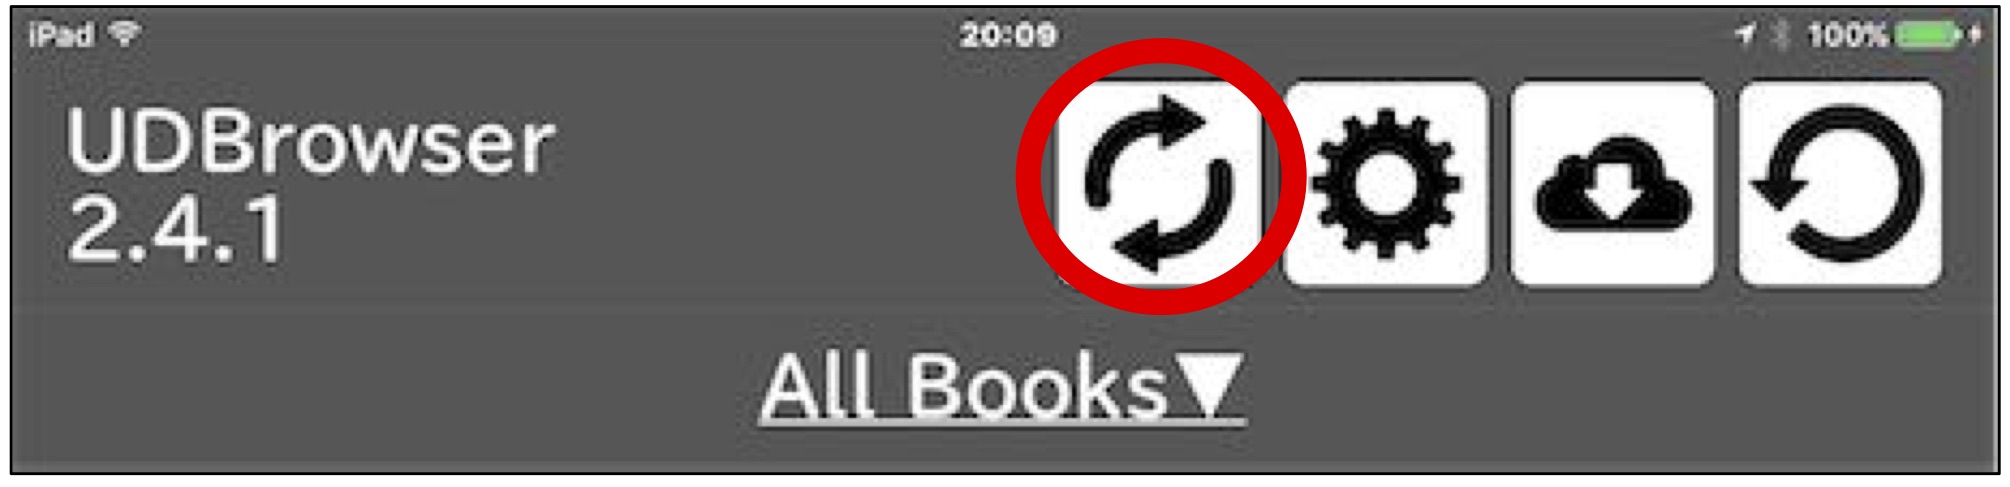
Figure 49 File Conversion Button
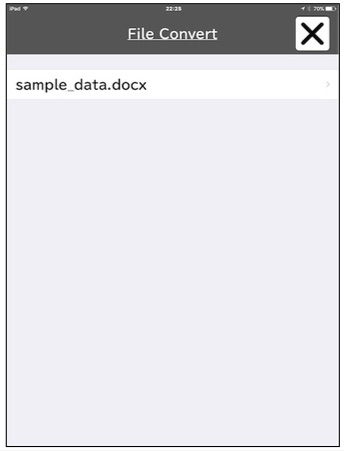
Figure 50 List Screen Displayed After Pressing the File Conversion Button
Figure 51 Preview Screen Displayed After Selecting the File
When you press Save, the HTML file is set in the UD browser. If you forward a PDF file and JSON file with the same file name in advance, as in the case of the sample text book, it is possible to switch between PDF mode and HTML mode when using.
For details of how to effectively create self-created materials see our home page below.
For details of using this app, refer to the following URL.
Please contact us at the following address if you have any requests related to defects or improvements to the app.
Thank you!